Have you ever heard of Pan Seared Shrimp? You’re about to discover how a few simple techniques can transform basic shrimp into a restaurant-worthy dish in just 10 minutes. By mastering the perfect pan sear, for your Pan Seared Shrimp you’ll achieve that coveted golden crust while keeping the inside tender and juicy – no more rubbery disappointments! Whether you’re cooking for yourself or impressing dinner guests, these foolproof steps will help you nail this classic seafood preparation every time.
Why You’ll Love This Recipe

Whether you’re a seafood enthusiast or just starting your culinary journey, you’ll absolutely love this pan seared shrimp recipe! Pan Seared Shrimp using this quick and versatile recipe comes together in just 10 minutes, making it perfect for busy weeknights when you want something impressive without the fuss.
You’ll appreciate how the simple preparation lets the shrimp’s natural sweetness shine through, while the golden-brown crust adds incredible texture and flavor. The recipe’s foolproof timing guarantees you’ll get perfectly cooked shrimp every time – no more rubbery results!
The perfect balance of sweet shrimp and crispy sear creates mouthwatering results every time – all thanks to this simple, precise technique. Pan Seared Shrimp!
Plus, you can easily customize the seasonings to match your favorite flavors. Best of all, you’ll only need basic pantry ingredients and one pan, which means minimal cleanup. Who doesn’t love a delicious meal that doesn’t create a sink full of dishes?
[DIRECTIONS]:
What You Will Need for Pan Seared Shrimp
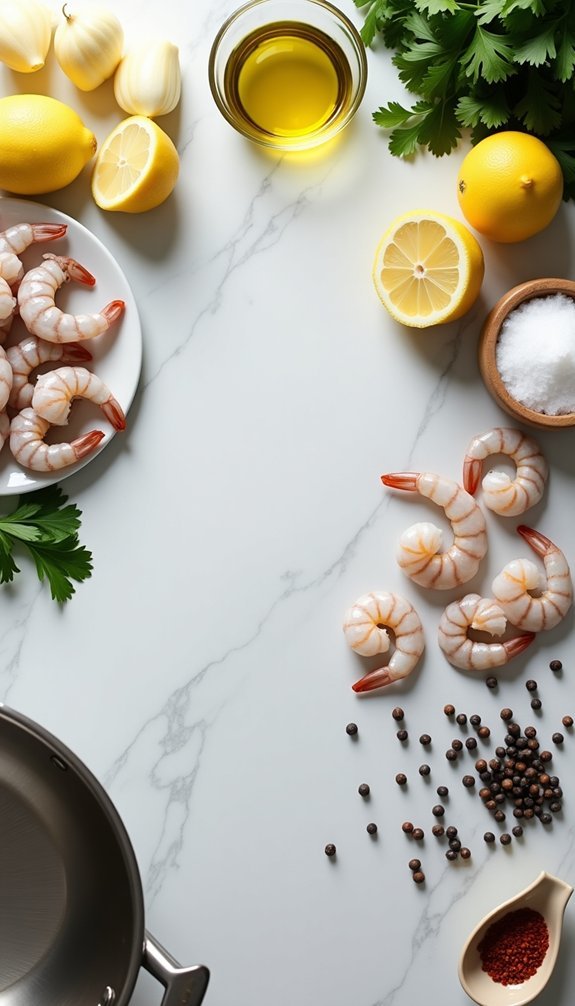
Before diving into this mouthwatering shrimp recipe, let’s gather everything you’ll need for perfect results.
Main Ingredients:
- 1 pound large shrimp, peeled and deveined
- 3 tablespoons olive oil
- 2 cloves garlic, minced
- 1 teaspoon salt
- ½ teaspoon black pepper
Equipment:
- Large skillet (12-inch recommended)
- Paper towels
- Tongs or spatula
- Measuring spoons
- Cutting board
- Sharp knife
You’ll also want to guarantee your shrimp are completely thawed if you’re starting with frozen ones – no shortcuts here!
A clean, dry workspace and a timer nearby will help you achieve that perfect sear. Trust me, having everything ready before you start will make this process smooth sailing.
[DIRECTIONS]:
Cooking Steps for Pan Seared Shrimp
You’ll want to start by patting your shrimp completely dry with paper towels and seasoning them with salt and pepper.
Heat your pan until the oil is shimmering, then add minced garlic and let it become fragrant for about 30 seconds before adding your shrimp.
Place your shrimp in a single layer (give them some personal space!) and cook for 2-3 minutes per side until they’re pink with a beautiful golden crust.
step 1. Pat Dry the Shrimp
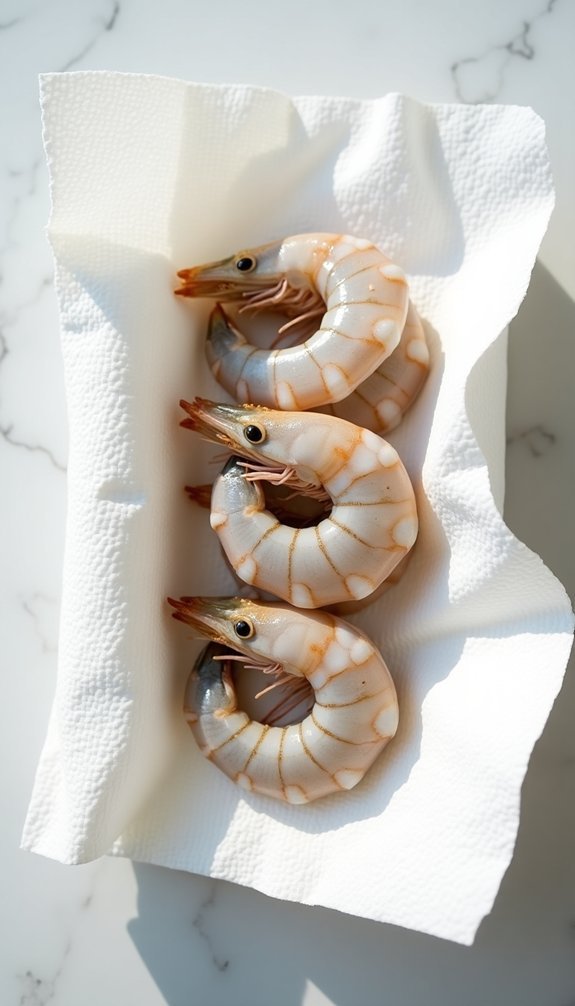
Proper drying of your shrimp is an essential first step that makes the difference between perfectly seared shrimp and a soggy disappointment.
Take your thawed shrimp and lay them out on a double layer of paper towels. Press another paper towel gently on top, allowing it to absorb all excess moisture.
You’ll want to make sure each shrimp is thoroughly dried – even small amounts of water can prevent that gorgeous golden crust from forming!
For best results:
- Change paper towels if they become too damp
- Pat each side of the shrimp at least twice
- Look for a matte, not glossy, appearance
- Don’t skip this step, even if you’re in a hurry
step 2. Season With Spices
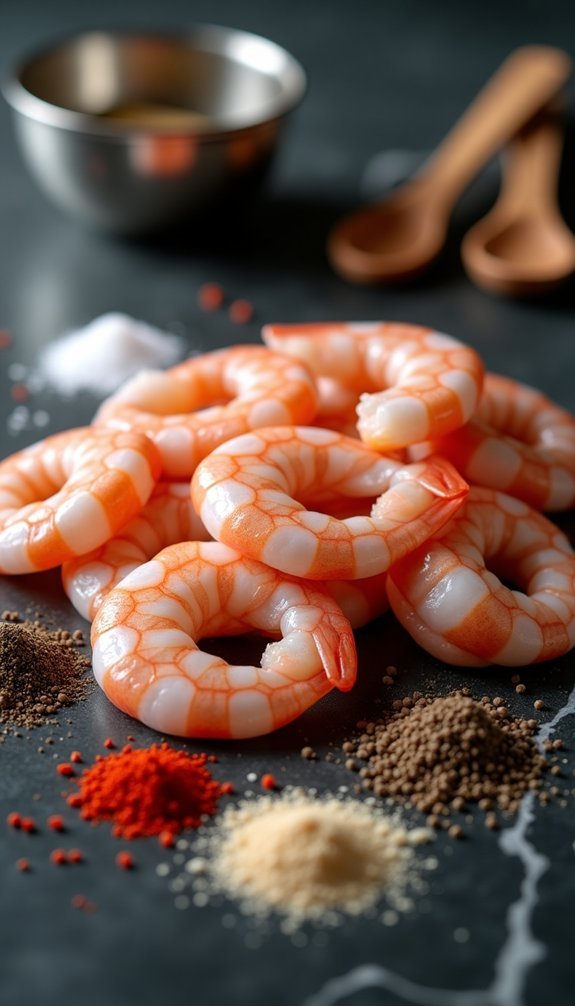
After patting the shrimp completely dry, it’s time to bring your dish to life with seasoning!
Start by evenly distributing 1 teaspoon of salt and 1/2 teaspoon of fresh black pepper over your shrimp. You’ll want to season both sides to guarantee consistent flavor throughout.
For extra depth, add 1/4 teaspoon of paprika or cayenne if you’re feeling adventurous!
While the classic salt and pepper combo works beautifully, you can customize your seasoning blend by incorporating:
- Garlic powder (1/2 teaspoon)
- Italian herbs (1 teaspoon)
- Cajun seasoning (1 teaspoon)
- Lemon zest (from 1 lemon)
step 3. Heat Pan Until Shimmering
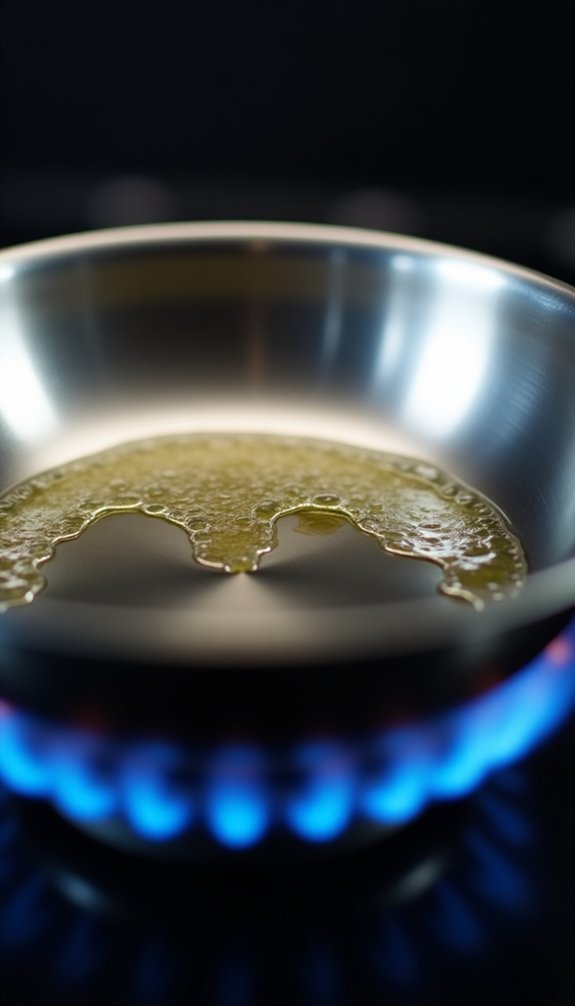
The next essential step is heating your large skillet over medium-high heat with 3 tablespoons of olive oil.
You’ll know your pan has reached the perfect temperature when the oil starts to shimmer and move fluidly across the surface.
Don’t rush this step – properly heating your pan typically takes 2-3 minutes, depending on your stovetop.
If you’re not sure whether it’s hot enough, drop a tiny bit of water in the pan; it should sizzle and evaporate immediately.
When you see those telltale ripples in the oil and feel the heat radiating from the surface, you’re ready to add your garlic.
Just remember, if your oil starts smoking, you’ve gone too far – remove the pan from heat briefly and let it cool down.
step 4. Add Garlic And Saute Pan Seared Shrimp
Minced garlic sizzling in hot oil creates an irresistible aroma that sets the stage for perfectly seared shrimp.
Once your pan’s hot and shimmering, add your minced garlic (about 2 cloves) and keep a close eye on it – nobody likes burnt garlic!
Let the garlic sauté for just 30 seconds, stirring constantly to prevent sticking. You’ll know it’s ready when the kitchen fills with that wonderful aroma and the garlic turns slightly golden.
Don’t let it brown too much, as it’ll continue cooking once you add the shrimp.
If your garlic starts browning too quickly, you can lower the heat slightly or push it to the sides of the pan where it’s cooler.
Remember, garlic can go from perfect to bitter in seconds!
[DIRECTIONS]:
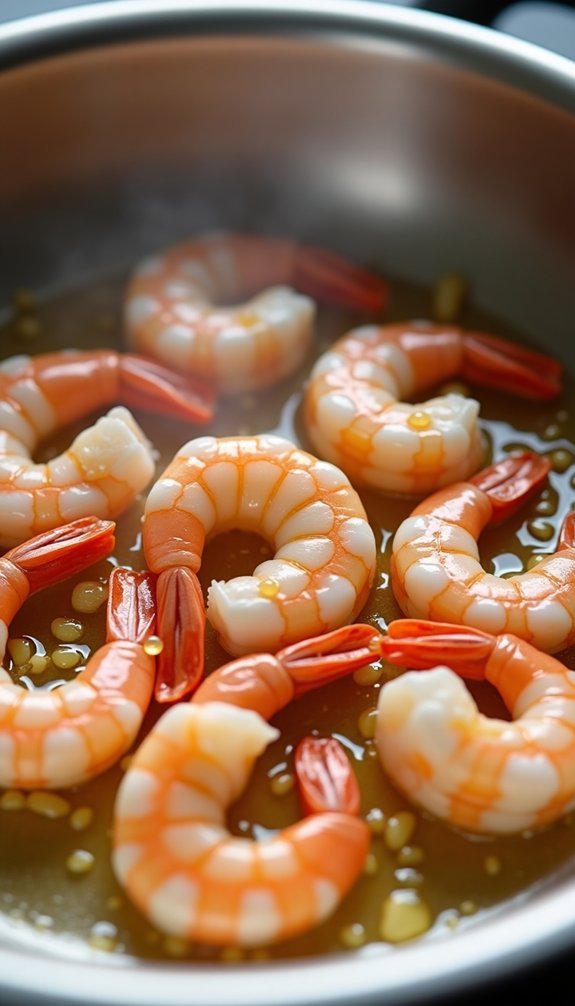
step 5. Sear Shrimp Until Pink
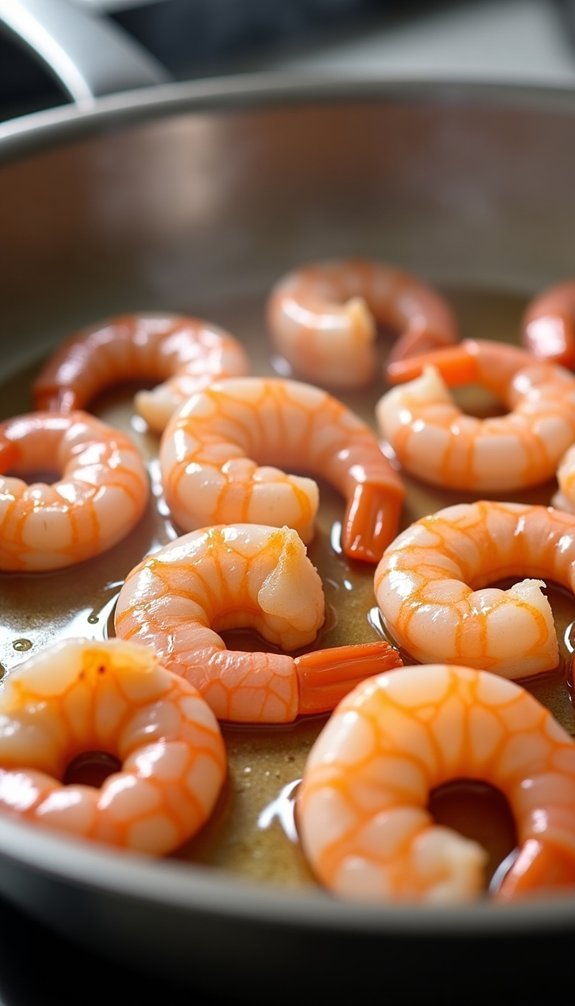
Now that your garlic has created an aromatic base, it’s time to add your dried, seasoned shrimp to the hot pan in a single layer.
Make sure they’re not touching each other – think of them as shy teenagers at their first dance!
Cook the shrimp for 2-3 minutes on the first side until you see a golden crust forming.
You’ll notice the edges starting to turn pink as they cook. When it’s time to flip them, they should release easily from the pan.
Cook for another 2-3 minutes on the second side until they form a ‘C’ shape and turn pink throughout.
Remember, if they curl into an ‘O’ shape, you’ve gone too far – nobody likes rubbery shrimp!
Remove them from the heat immediately when done.
What To Pair With

Pan seared shrimp pairs beautifully with a variety of sides that complement its delicate seafood flavor and crispy exterior.
You’ll love serving these succulent shrimp over fluffy jasmine rice or angel hair pasta tossed in garlic butter.
For a lighter option, try placing them atop mixed greens with cherry tomatoes and avocado slices.
You can’t go wrong with classic pairings like creamy risotto or roasted vegetables – especially asparagus or broccoli.
If you’re feeling adventurous, serve your shrimp with zucchini noodles or quinoa pilaf!
Don’t forget the sauce options: a squeeze of fresh lemon juice, white wine sauce, or cilantro-lime butter will elevate your dish.
For a complete meal, add crusty bread to soak up those delicious pan juices.
Storage Suggestions for Pan Seared Shrimp
Although properly cooked shrimp tastes best when served immediately, you can store leftover pan seared shrimp in an airtight container in your refrigerator for up to 3 days.
Let them cool completely before storing to prevent condensation, which can make them soggy.
If you’re planning to reheat your shrimp, don’t microwave them – they’ll turn rubbery faster than you can say “seafood”!
Instead, warm them gently in a skillet over medium-low heat for 2-3 minutes. You can also use them cold in salads or sandwiches.
For longer storage, you can freeze pan seared shrimp for up to 3 months.
Place them in a freezer-safe bag, removing as much air as possible to prevent freezer burn.
Thaw overnight in the refrigerator before reheating.
Now that you have read about this method of making some of the best Pan Seared Shrimp you will ever have. It is time to get into the kitchen and cook. So lets get there right now and try out this recipe.