Who here likes Chocolate Cobbler? What if it is just like your grandmother’s secret recipe box? You know, the one that held treasures from harder times, chocolate cobbler stands as a symbol of culinary ingenuity during the Great Depression. You’ll find this dessert breaks all the rules – it’s messy, unpredictable, and somehow creates its own chocolate sauce while baking! As you prepared to discover how a few simple pantry staples transform into layers of cake and molten chocolate, you’ll understand why this humble dessert has earned its place at countless family tables. Start right now and whip up this Chocolate Cobbler!
History of Chocolate Cobbler
While the exact origins of chocolate cobbler remain somewhat unclear, this Southern comfort dessert likely emerged during the Great Depression when home cooks needed to create satisfying treats with limited ingredients.
You’ll find that chocolate cobbler shares similarities with other Depression-era desserts like “water pie” and “vinegar pie,” where creative bakers made magic with basic pantry staples.
The recipe’s clever technique of creating a sauce underneath while baking made it feel more luxurious than its simple ingredients would suggest.
During the 1940s and 50s, you’d commonly find this dessert at church potlucks and family gatherings across the American South.
The recipe gained wider popularity when community cookbooks began featuring versions of it, often called “chocolate pudding cake” or “hot fudge pudding cake.”
Recipe for the best Chocolate Cobbler
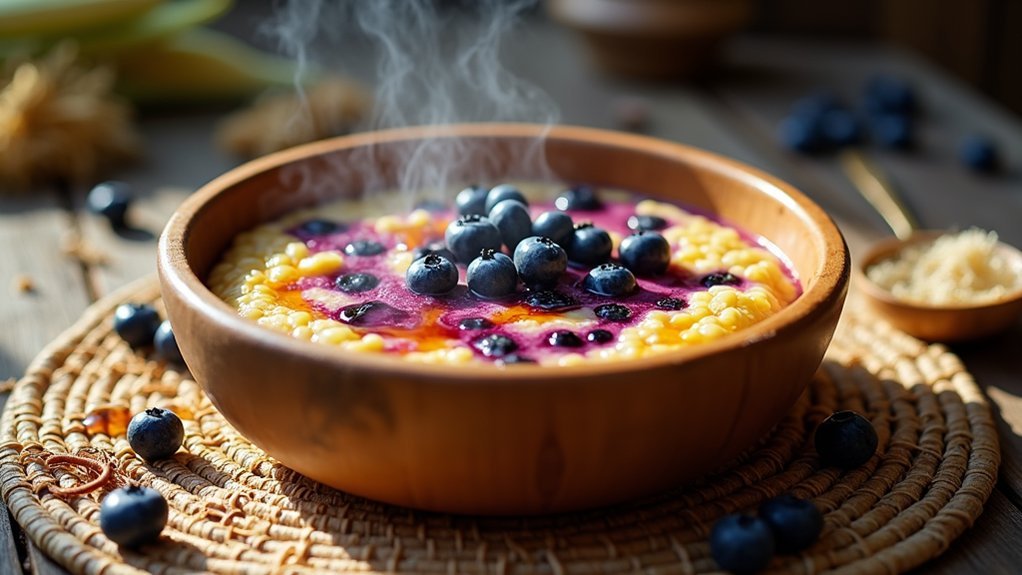
Chocolate cobbler is a divine dessert that transforms simple pantry ingredients into a magical treat with layers of flavor and texture. This self-saucing pudding-like dessert creates its own warm chocolate sauce beneath a cake-like surface during the baking process.
The beauty of this recipe lies in its simplicity and the surprising way it comes together. While it may seem counterintuitive to pour hot water over the top of the batter, this step is essential in creating the signature molten chocolate layer that makes this dessert so special.
- 1 cup self-rising flour
- 1 cup granulated sugar
- ½ cup unsalted butter, melted
- ½ cup milk
- ¼ cup cocoa powder
- Hot water (for topping)
- Additional sugar for topping
- 1 pinch salt
Preheat oven to 350°F (175°C) and grease an 8×8 inch baking dish. In a mixing bowl, combine flour and sugar, then stir in the melted butter and milk until the batter is smooth. Pour this mixture into the prepared baking dish.
In a separate bowl, mix cocoa powder with additional sugar and sprinkle this mixture evenly over the batter. Pour hot water over the entire surface without stirring. Bake for 30-35 minutes until the top is set but still slightly jiggly in the center.
For best results, avoid opening the oven door during the first 25 minutes of baking, as this can affect the formation of the chocolate sauce. The cobbler is best served warm within 30 minutes of baking, though it can be reheated with a splash of milk to maintain the sauce consistency.
If the edges start to brown too quickly during baking, cover them loosely with aluminum foil to prevent overbaking.
Cooking Steps for Chocolate Cobbler
You’ll want to start by combining your flour and sugar in a large bowl before gradually stirring in the melted butter and milk until smooth.
Next, transfer your chocolate batter to a greased 8×8 baking dish and evenly sprinkle the cocoa-sugar mixture over the top.
Finally, pour hot water over everything (don’t stir!), and you’re ready to pop it in the oven for that magical transformation!
step 1. Mix Dry Ingredients First
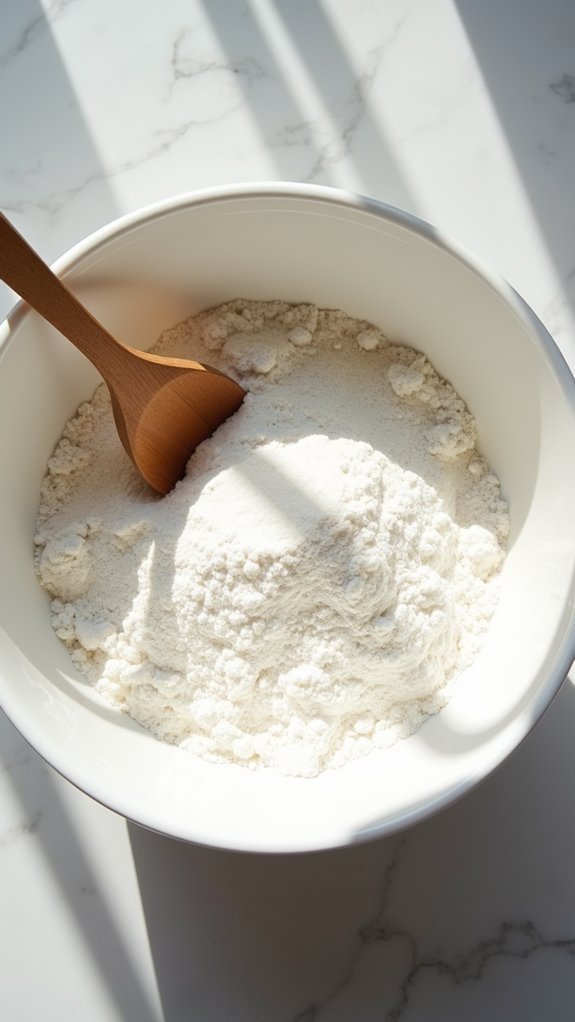
Start your chocolate cobbler journey by gathering the flour and sugar in a large mixing bowl. You’ll need exactly 1 cup of self-rising flour and 1 cup of granulated sugar – precision matters here!
Make sure you’re using a bowl that’s large enough to accommodate both ingredients with room for stirring.
Using a whisk or fork, combine these dry ingredients thoroughly until they’re well integrated. You’ll want to break up any flour clumps you spot – nobody wants to bite into a flour pocket later!
Take a moment to run your whisk through the mixture several times, ensuring the sugar and flour are evenly distributed. This simple step creates the foundation for your cobbler’s perfect texture, so don’t rush through it.
step 2. Add Wet Ingredients Gradually
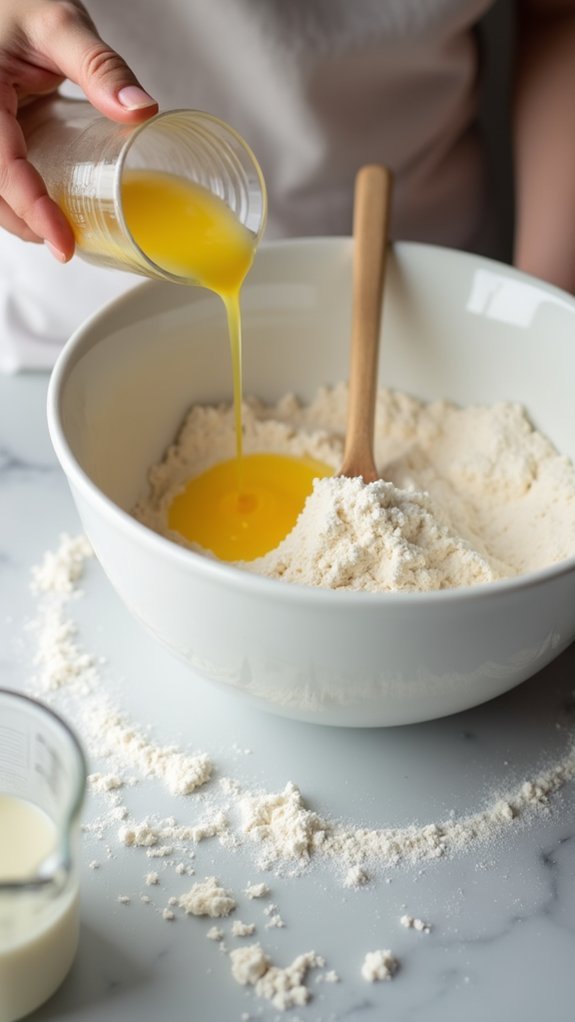
Once your dry ingredients are thoroughly combined, it’s time to introduce the wet ingredients that’ll transform your mixture into a velvety batter.
Start by drizzling in your ½ cup of melted, unsalted butter while stirring continuously. You’ll notice the mixture becoming slightly crumbly – that’s exactly what you want!
Next, pour in the ½ cup of milk gradually, about 2 tablespoons at a time, while mixing. Don’t worry if it looks a bit lumpy at first; keep stirring until the batter becomes smooth and pourable.
The consistency should be similar to cake batter – not too thick or too thin. If your batter seems too thick, add an extra tablespoon of milk. Too thin? Just sprinkle in a bit more flour, one teaspoon at a time.
step 3. Pour Into Baking Dish
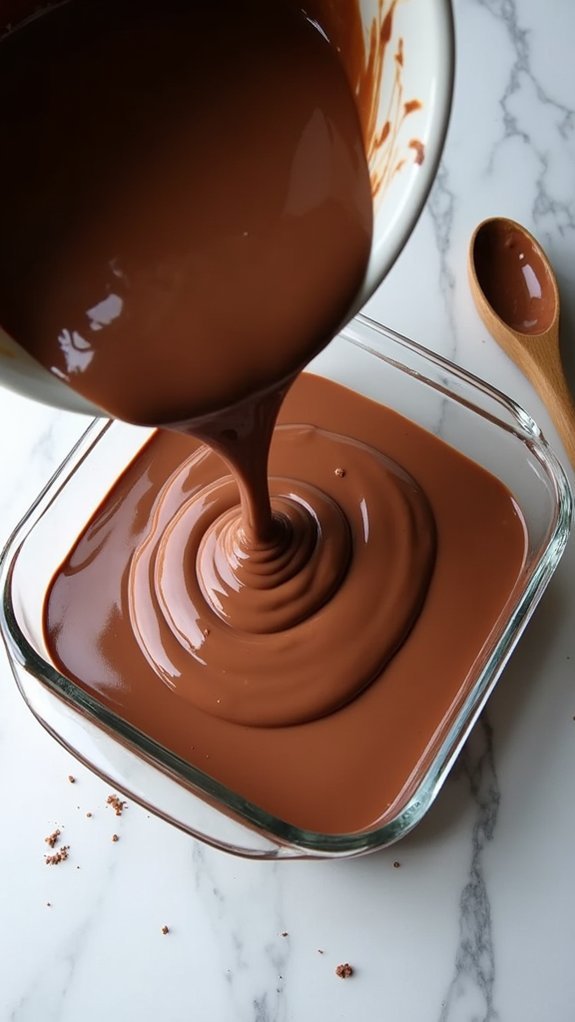
Gently pour the smooth chocolate batter into a greased 8×8-inch baking dish, making sure to spread it evenly to all corners.
You’ll want to use a rubber spatula to help guide the batter, ensuring no empty spaces remain along the edges.
Once your batter is level, you’ll notice it’s about 1-inch thick – that’s perfect! If you’re using a glass baking dish, you can check the bottom to make sure there aren’t any air pockets.
Don’t worry if the surface isn’t perfectly smooth; it’ll even out during baking. At this stage, your batter should look like a glossy chocolate lake waiting for its cocoa powder snowfall!
Remember to keep your oven preheated to 350°F while you complete this step, as you’ll want to move quickly to the next phase of adding the cocoa mixture.
step 4. Sprinkle Cocoa-Sugar Mixture
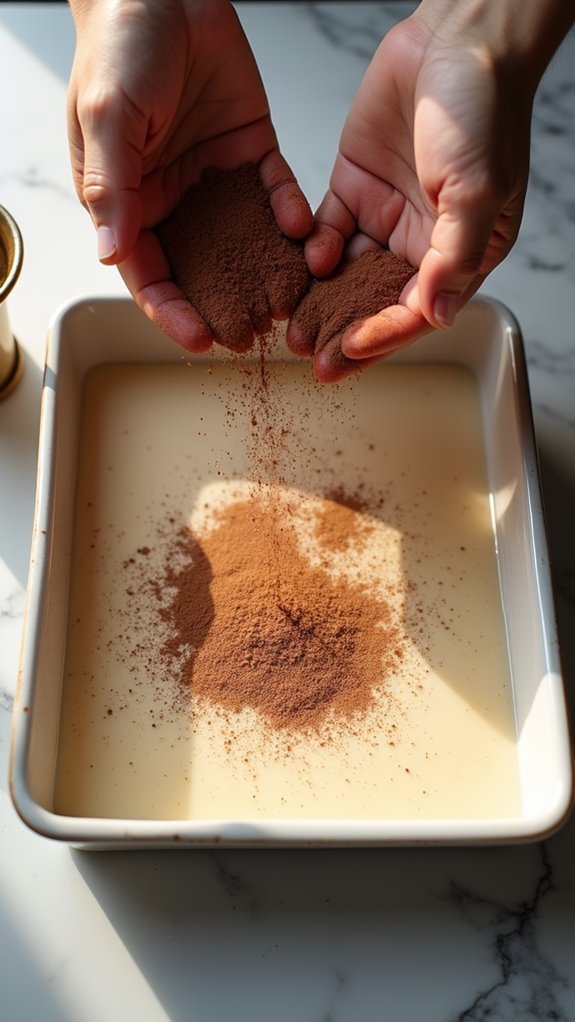
The next magical layer of your chocolate cobbler comes from combining the remaining sugar with cocoa powder.
In a separate bowl, mix 1/2 cup granulated sugar with 1/4 cup cocoa powder until they’re thoroughly blended – no cocoa clumps allowed!
Using a gentle hand, sprinkle your cocoa-sugar mixture evenly over the batter’s surface. You’ll want complete coverage here, like you’re dusting the landscape with chocolate snow.
Don’t worry if it seems like a lot of powder – this is what creates that irresistible chocolate sauce underneath. Be sure to distribute the mixture right to the edges of your baking dish, as any bare spots will miss out on that signature cobbler magic.
Remember: no stirring after sprinkling, or you’ll disrupt the layers that make this dessert special!
step 5. Pour Hot Water Layer
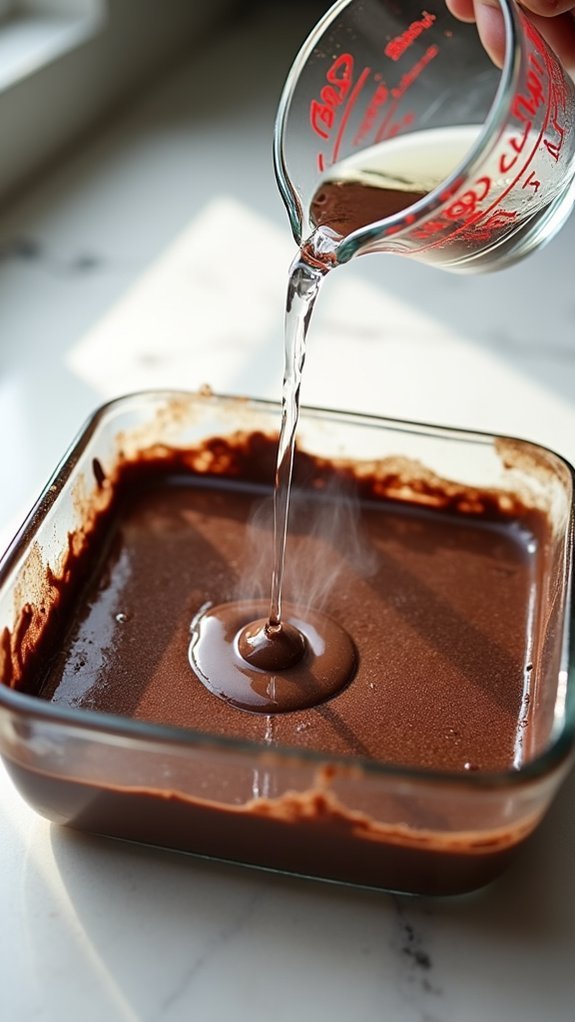
Now comes the part where we add the secret ingredient that makes chocolate cobbler truly magical – hot water!
Pour 1½ cups of hot (not boiling) water gently over the cocoa-sugar layer you’ve just created. You’ll notice the water settling on top, and while it might look a bit odd, don’t worry – that’s exactly what you want!
Don’t stir the mixture, as tempting as it may be. The water will work its chemistry during baking, creating that signature gooey chocolate sauce underneath.
For best results, pour the water in a steady stream, moving back and forth across the dish to guarantee even distribution.
If you’re wondering whether you’re doing it right, the top should look like a shallow chocolate pond before it goes into the oven.
Trust the process – the magic is about to happen!
Final Thoughts
Making this chocolate cobbler recipe proves that impressive desserts don’t require advanced baking skills or countless ingredients. You’ll find that the magic happens right in your oven as the layers transform into a cake-like top with gooey chocolate sauce underneath.
Remember to serve your cobbler while it’s still warm – ideally within 30 minutes of baking. If you need to reheat leftovers, just add a splash of milk before warming to maintain that perfect sauce consistency. Also make sure to make note of any changes you make and share them here for us and our readers.
Don’t worry if your first attempt isn’t picture-perfect; the rustic appearance is part of its charm! Keep in mind that overbaking is your biggest enemy here, so stick to the 30-35 minute baking time at 350°F and look for that slightly jiggly center.