I think its about time for some Creative Grilling Recipes! Is it really possible to elevate your grilling game with just a few creative recipes? You bet! With 20 unique dishes to explore, you’ll impress your friends and family in no time. From zesty shrimp skewers to decadent chocolate-covered bananas, there’s a flavor for everyone. Ready to fire up the grill and discover some mouthwatering options? Let’s get started on these delicious adventures that’ll have you craving seconds! So lets get started with this hot list of Creative Grilling Recipes and then you let me know what you think. And feel free to send us some of your own and your favorite Creative Grilling Recipes!
Grilled Pineapple and Shrimp Skewers From our Creative Grilling Recipes.
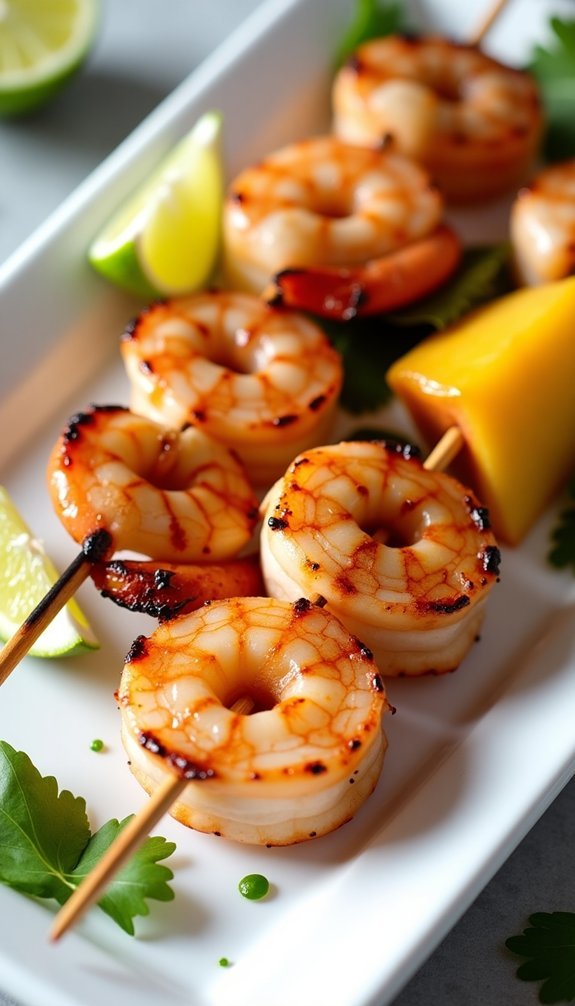
Grilled pineapple and shrimp skewers are a delightful combination of sweet and savory flavors that make for a perfect summer barbecue dish. The juicy, caramelized chunks of pineapple complement the succulent shrimp beautifully, creating a dish that isn’t only visually appealing but also bursting with flavor. This recipe is easy to prepare and can be served as an appetizer or main dish, making it versatile for any occasion.
To enhance the tropical flair, the shrimp are marinated in a zesty mixture of lime juice, garlic, and spices, which infuses them with a burst of flavor. Once skewered with fresh pineapple, the combination is grilled to perfection, resulting in a smoky, charred exterior and a tender, juicy inside. Serve them with a sprinkle of fresh cilantro and a wedge of lime for that extra touch.
Ingredients:
- 1 pound large shrimp, peeled and deveined
- 1 cup fresh pineapple, cut into bite-sized chunks
- 1/4 cup olive oil
- 2 tablespoons lime juice
- 2 cloves garlic, minced
- 1 teaspoon chili powder
- 1/2 teaspoon salt
- 1/4 teaspoon black pepper
- Skewers (wooden or metal)
- Fresh cilantro, for garnish
- Lime wedges, for serving
To prepare the skewers, start by marinating the shrimp in a bowl with olive oil, lime juice, minced garlic, chili powder, salt, and black pepper for at least 30 minutes. While the shrimp are marinating, soak wooden skewers in water if using, to prevent burning.
Preheat your grill to medium-high heat. Once the shrimp have marinated, thread them onto the skewers alternating with the pineapple chunks. Grill the skewers for 2-3 minutes on each side or until the shrimp are opaque and cooked through, and the pineapple has nice grill marks.
When grilling pineapple and shrimp skewers, it’s crucial to not overcook the shrimp, as they can become rubbery. Keep an eye on them while grilling and remove them from the heat as soon as they turn opaque.
You can also experiment with adding other vegetables to the skewers, such as bell peppers or red onions, for added color and flavor. Finally, for a touch of heat, consider adding a pinch of cayenne pepper to the marinade or serving with a spicy dipping sauce. Enjoy your tropical grilling adventure!
Spicy Watermelon Salad With Grilled Feta
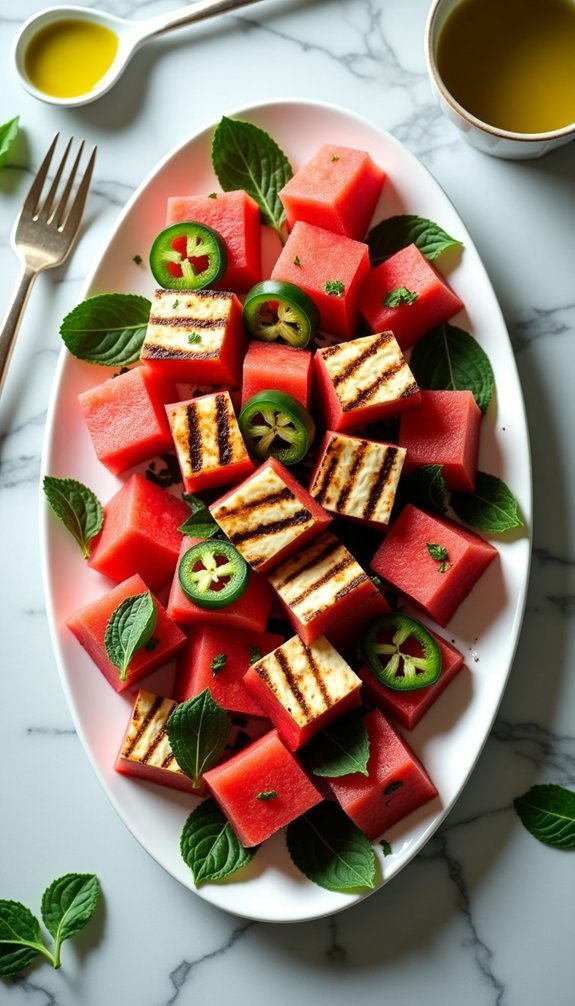
Grilling isn’t just for meats and vegetables; it can elevate a variety of dishes to new heights. One such dish is the Spicy Watermelon Salad with Grilled Feta, which combines the sweetness of watermelon with the savory, creamy goodness of feta cheese, all brought together by a kick of spice. This invigorating salad is perfect for summer barbecues or as a light appetizer, making it a delightful addition to any meal.
The smoky notes from the grilled feta add depth to the dish, while the watermelon provides hydration and a burst of flavor. To prepare this salad, you’ll want to start by selecting a ripe watermelon and a high-quality feta cheese. The grilling process not only enhances the feta’s flavor but also gives it a delightful texture that contrasts beautifully with the juicy watermelon.
Pair it with a zesty dressing that includes lime juice and a hint of chili powder, and you’ll have a dish that’s both visually stunning and incredibly delicious. This vibrant salad is sure to impress your guests and leave them wanting more.
Ingredients:
- 4 cups watermelon, cubed
- 8 oz feta cheese, sliced
- 2 tablespoons olive oil
- 1 tablespoon lime juice
- 1 teaspoon chili powder
- Salt and pepper to taste
- Fresh mint leaves, for garnish
- Optional: sliced jalapeños for extra heat
Instructions:
Begin by preheating your grill to medium-high heat. Brush the sliced feta cheese with olive oil and sprinkle a little salt and pepper on both sides. Place the feta on the grill and cook for about 2-3 minutes on each side, or until it develops a nice char and becomes slightly soft.
While the feta is grilling, combine the cubed watermelon, lime juice, and chili powder in a large bowl, tossing to coat the watermelon evenly. Once the feta is grilled, remove it from the grill and let it cool slightly before breaking it into large pieces. Gently fold the grilled feta into the watermelon mixture, garnish with fresh mint leaves, and serve immediately.
Extra Tips:
When selecting your watermelon, look for one that feels heavy for its size and has a uniform shape, as these are indicators of ripeness. For added complexity, consider marinating the watermelon cubes in a bit of lime juice and chili powder for 30 minutes before grilling the feta.
This will infuse the fruit with more flavor. Adjust the spice level to your preference by adding more or fewer jalapeños, and feel free to experiment with additional herbs like basil or cilantro for a unique twist on this classic summer dish!
Maple-Glazed Salmon With Lemon Zest
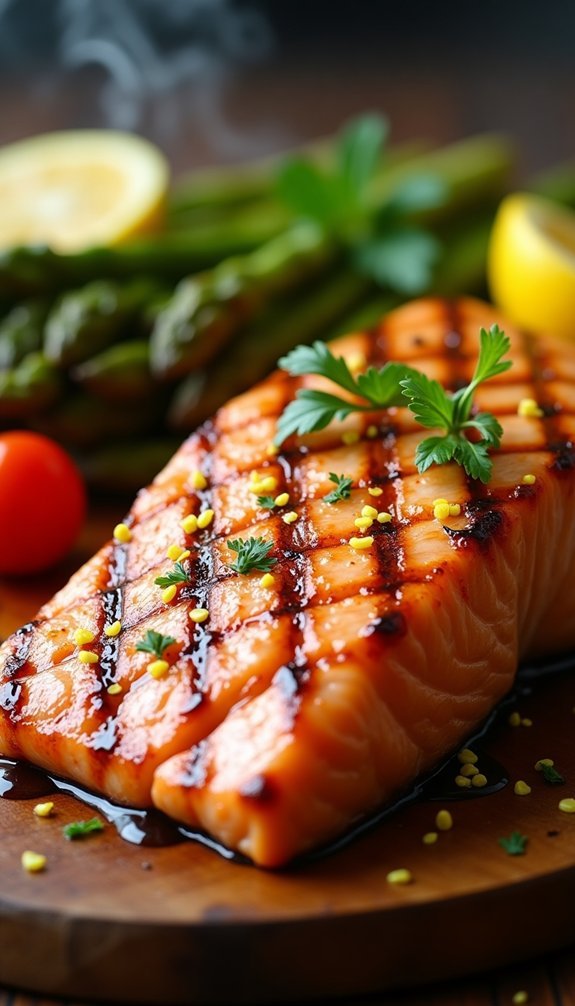
Maple-glazed salmon with lemon zest is a delightful dish that combines the rich, buttery flavor of salmon with the sweet and tangy notes of maple syrup and fresh lemon. This recipe is perfect for summer barbecues or cozy dinners at home, bringing a taste of the outdoors to your dining table.
The glaze caramelizes beautifully on the grill, giving the salmon a lovely glossy finish while keeping it moist and tender on the inside. Preparing this dish isn’t only easy but also a great way to impress your family and friends with your culinary skills.
The balance of flavors from the maple syrup and lemon zest enhances the natural taste of the salmon, making it a dish that’s both simple and sophisticated. Serve it with a side of grilled vegetables or a fresh salad for a complete meal that everyone will love.
Ingredients:
- 4 salmon fillets
- 1/4 cup pure maple syrup
- 1 tablespoon Dijon mustard
- 1 tablespoon soy sauce
- Zest of 1 lemon
- Juice of 1 lemon
- Salt and pepper to taste
- Fresh parsley for garnish (optional)
Cooking Instructions:
In a small bowl, whisk together the maple syrup, Dijon mustard, soy sauce, lemon zest, lemon juice, salt, and pepper to create the glaze.
Preheat your grill to medium-high heat. Pat the salmon fillets dry with a paper towel and brush each side with the glaze. Place the salmon skin-side down on the grill grates and cook for about 5-6 minutes per side, basting with additional glaze as needed, until the salmon is cooked through and flakes easily with a fork.
Remove from the grill and let rest for a few minutes before serving.
Extra Tips:
For the best results, choose salmon fillets that are of equal thickness to guarantee even cooking. You can also marinate the salmon in the glaze for up to an hour before grilling for enhanced flavor.
If you prefer, this recipe can be adapted for baking in the oven at 375°F for about 15-20 minutes, covered with foil to retain moisture. Finally, feel free to add your favorite herbs or spices to the glaze for a personalized touch!
Grilled Vegetable Platter With Herb Dressing
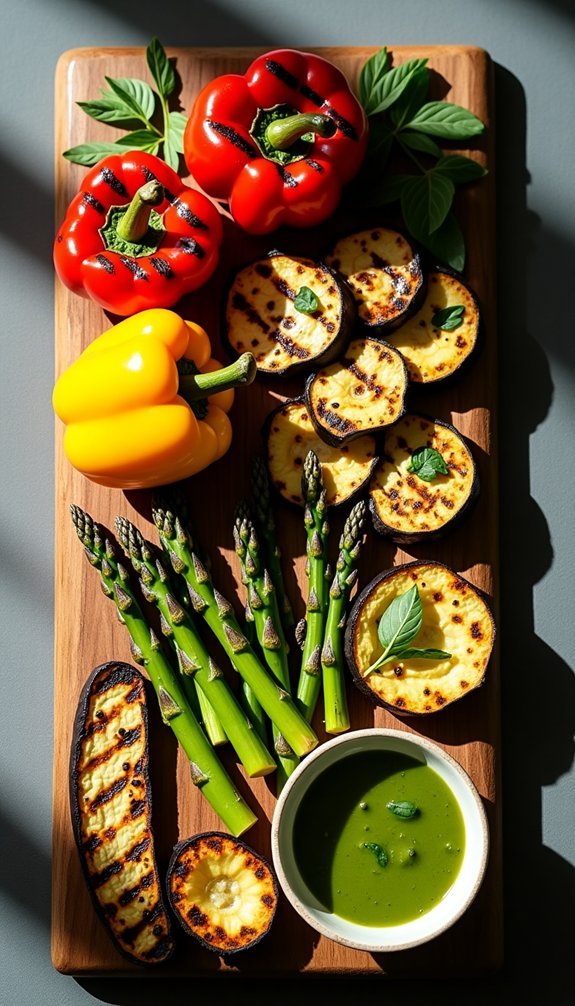
Grilled vegetable platters are a delightful way to showcase the vibrant flavors of fresh produce while enjoying the smoky char from the grill. Perfect as a side dish or a main course for vegetarians, this recipe allows you to experiment with a variety of seasonal vegetables. The addition of a zesty herb dressing elevates the dish, bringing a revitalizing balance to the earthy flavors of the grilled veggies.
To create the perfect grilled vegetable platter, choose a colorful assortment of vegetables that are in season. Bell peppers, zucchini, eggplant, and asparagus are excellent choices, but feel free to include whatever you have on hand. The herb dressing is a simple yet flavorful combination of fresh herbs, olive oil, lemon juice, and garlic that ties everything together beautifully.
Serve this platter at your next barbecue or picnic, and watch it disappear in no time!
Ingredients:
- 1 red bell pepper
- 1 yellow bell pepper
- 1 medium zucchini
- 1 medium summer squash
- 1 medium eggplant
- 1 bunch asparagus
- 1 tablespoon olive oil
- Salt and pepper to taste
- 1/4 cup fresh basil leaves
- 1/4 cup fresh parsley leaves
- 1 clove garlic, minced
- 2 tablespoons lemon juice
- 1/4 cup olive oil (for dressing)
Cooking Instructions:
Preheat your grill to medium-high heat. While the grill is heating, wash and slice the vegetables into even pieces for uniform cooking. In a large bowl, toss the sliced vegetables with a tablespoon of olive oil, salt, and pepper until well coated.
Place the vegetables directly on the grill or use a grill basket if you prefer. Grill the vegetables for about 5-7 minutes on each side, or until they’re tender and have nice grill marks.
Meanwhile, prepare the herb dressing by combining the fresh basil, parsley, minced garlic, lemon juice, and olive oil in a small bowl, mixing well until smooth. Once the vegetables are grilled to perfection, remove them from the grill and drizzle with the herb dressing before serving.
Extra Tips:
To enhance the flavors even further, consider marinating the vegetables in a mixture of olive oil, balsamic vinegar, and your choice of herbs for at least 30 minutes before grilling. This will infuse them with extra taste.
Additionally, you can experiment with different vegetable combinations or add in some grilled fruit like peaches or pineapples for a sweet touch. Always keep an eye on the grill; vegetables can cook quickly, and you want to avoid any charring that makes them taste bitter.
Enjoy your grilled vegetable platter warm or at room temperature!
BBQ Chicken Pizza on the Grill

BBQ Chicken Pizza on the Grill is a delightful twist on traditional pizza, combining the smoky flavors of grilled chicken with the sweet and tangy taste of barbecue sauce. This easy-to-make dish is perfect for summer gatherings and family dinners, allowing you to enjoy the great outdoors while cooking up a delicious meal.
With a crispy crust and a medley of toppings, each bite offers a burst of flavor that will have everyone asking for seconds.
To make this BBQ Chicken Pizza, you’ll want to start with some pre-cooked chicken to save time, but feel free to grill your chicken from scratch for that added smoky flavor. The dough can be store-bought or homemade, making it a versatile option for any pizza lover.
Once you have your ingredients ready, grilling the pizza is a fun and interactive way to create a personalized meal right on your backyard grill.
Ingredients:
- 1 pound of pre-cooked chicken, shredded
- 1 cup of barbecue sauce
- 1 pound of pizza dough
- 1 cup of mozzarella cheese, shredded
- 1/2 cup of red onion, thinly sliced
- 1/2 cup of fresh cilantro, chopped
- Olive oil for brushing
- Salt and pepper to taste
Cooking Instructions:
Start by preheating your grill to medium heat. In a bowl, combine the shredded chicken with half of the barbecue sauce, mixing well to coat.
Roll out the pizza dough on a floured surface to your desired thickness. Brush one side of the dough with olive oil and place it on the grill, oiled side down. Grill for about 3-5 minutes or until golden brown.
Flip the dough, then quickly spread the remaining barbecue sauce over the grilled side. Top with the BBQ chicken mixture, mozzarella cheese, and red onion. Close the grill lid and cook for an additional 5-7 minutes, or until the cheese is melted and bubbly.
Remove from the grill and garnish with fresh cilantro before slicing.
Extra Tips:
For an even more flavorful pizza, consider adding toppings like jalapeños for heat or pineapples for a sweet contrast.
If you’re using homemade dough, let it rest for at least 30 minutes before grilling to guarantee a good rise. You can also experiment with different types of cheese, such as smoked gouda or cheddar, to elevate the flavor profile.
Finally, make sure to keep an eye on the grill to prevent any burning, as grill temperatures can vary. Enjoy your BBQ Chicken Pizza fresh off the grill!
Smoky Grilled Cauliflower Steaks
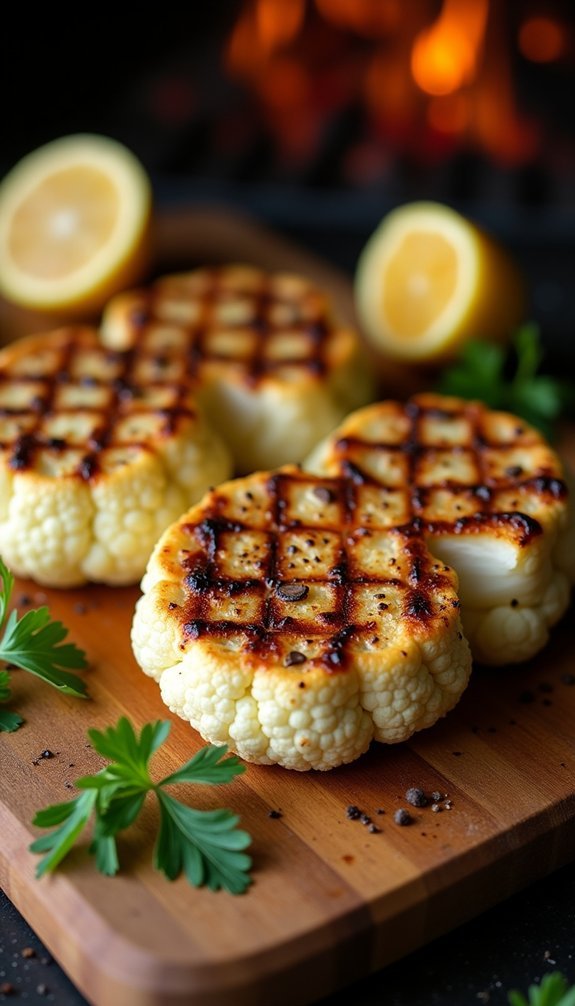
Grilling isn’t just for meat; vegetables can shine on the grill too, and cauliflower is a perfect candidate for this smoky, flavorful cooking method. By slicing cauliflower into thick “steaks,” you create a hearty and satisfying dish that can stand on its own or serve as a delicious side.
With a few simple ingredients, you can infuse the cauliflower with smoky flavors and a delightful char that enhances its natural sweetness. This Smoky Grilled Cauliflower Steaks recipe isn’t only easy to prepare but also versatile. You can serve it as a main course, a side dish, or even as a part of a vegetable platter.
The marinade is flexible, allowing you to adjust the spices to suit your taste. So fire up your grill and get ready to enjoy a unique and healthy dish that everyone will love!
Ingredients:
- 1 large head of cauliflower
- 3 tablespoons olive oil
- 2 teaspoons smoked paprika
- 1 teaspoon garlic powder
- 1 teaspoon onion powder
- 1 teaspoon salt
- ½ teaspoon black pepper
- Fresh parsley, chopped (for garnish)
- Lemon wedges (for serving)
Instructions:
Start by preheating your grill to medium heat. While the grill is heating, remove the leaves from the cauliflower and slice the head into thick steaks, about ¾ inch thick.
In a small bowl, whisk together the olive oil, smoked paprika, garlic powder, onion powder, salt, and black pepper. Brush both sides of the cauliflower steaks generously with the marinade.
Once the grill is hot, place the steaks on the grill grates and cook for about 5-7 minutes on each side, or until they’re tender and have nice grill marks. Remove from the grill and garnish with fresh parsley and a squeeze of lemon juice before serving.
Extra Tips:
For the best results, choose a fresh cauliflower head that feels heavy for its size and has tightly packed florets.
When grilling, keep an eye on the cauliflower to prevent burning, as grill temperatures can vary. If you prefer a more intense smoky flavor, consider adding a handful of wood chips to your grill.
Additionally, you can experiment with different spices or marinades to customize the flavor to your liking, such as adding cumin for an earthy note or a dash of chili powder for some heat.
Enjoy your grilled cauliflower steaks with your favorite dipping sauce or alongside other grilled vegetables for a complete meal!
Mediterranean Stuffed Peppers
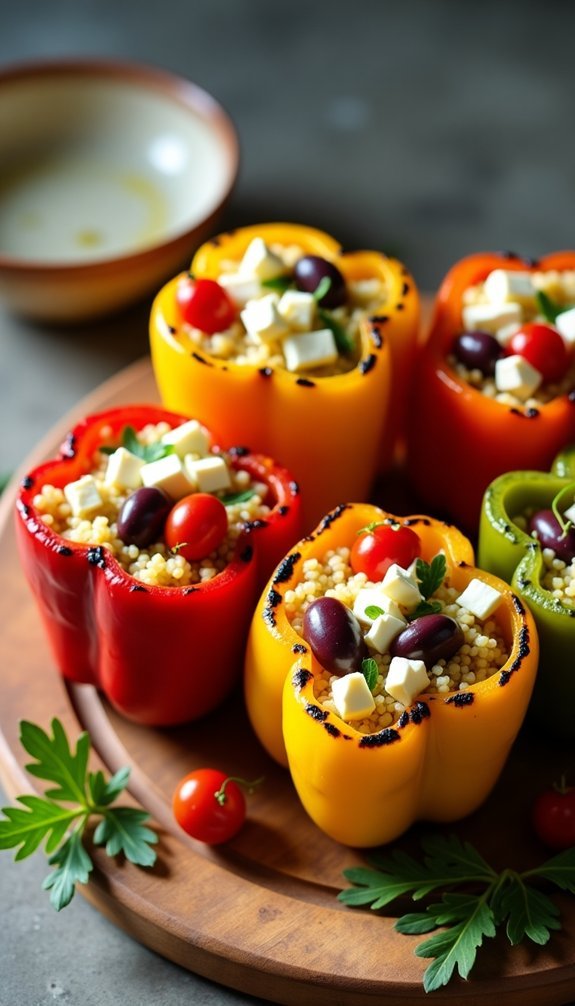
Mediterranean stuffed peppers are a delightful and vibrant dish that brings the flavors of the Mediterranean to your grill. These colorful peppers aren’t only visually appealing but also packed with nutrients and flavor. Stuffed with a savory mixture of quinoa, feta cheese, olives, and herbs, they make for a perfect appetizer, side dish, or even a main course.
Grilling these peppers adds a delicious smoky flavor while keeping them tender yet slightly charred, enhancing the overall experience. This recipe is easy to prepare and can be customized to suit your taste preferences.
Whether you’re hosting a summer barbecue or enjoying a cozy dinner at home, Mediterranean stuffed peppers are sure to impress your guests and family alike. Serve them warm off the grill, and watch as everyone digs in for seconds.
Ingredients:
- 4 large bell peppers (any color)
- 1 cup cooked quinoa
- 1 cup crumbled feta cheese
- 1/2 cup Kalamata olives, chopped
- 1/2 cup cherry tomatoes, halved
- 1/4 cup red onion, finely chopped
- 2 cloves garlic, minced
- 1 teaspoon dried oregano
- 1 teaspoon dried basil
- Salt and pepper to taste
- Olive oil for drizzling
- Fresh parsley for garnish
To prepare the Mediterranean stuffed peppers, start by preheating your grill to medium heat. Cut the tops off the bell peppers and remove the seeds and membranes.
In a large mixing bowl, combine the cooked quinoa, feta cheese, chopped olives, cherry tomatoes, red onion, garlic, oregano, and basil. Season the mixture with salt and pepper to taste. Stuff each bell pepper with the quinoa mixture, pressing down gently to pack it in. Drizzle the tops with a little olive oil, then place the stuffed peppers on the grill.
Close the lid and grill for about 20-25 minutes, or until the peppers are tender and slightly charred. When grilling stuffed peppers, it’s important to monitor them closely to avoid overcooking.
You can also experiment with different fillings, such as ground turkey or chickpeas for added protein. If you prefer a slightly sweeter flavor, try using yellow or orange bell peppers. For an extra touch, consider adding a squeeze of fresh lemon juice or a sprinkle of fresh herbs right before serving. Enjoy your delicious Mediterranean stuffed peppers!
Cilantro-Lime Grilled Corn
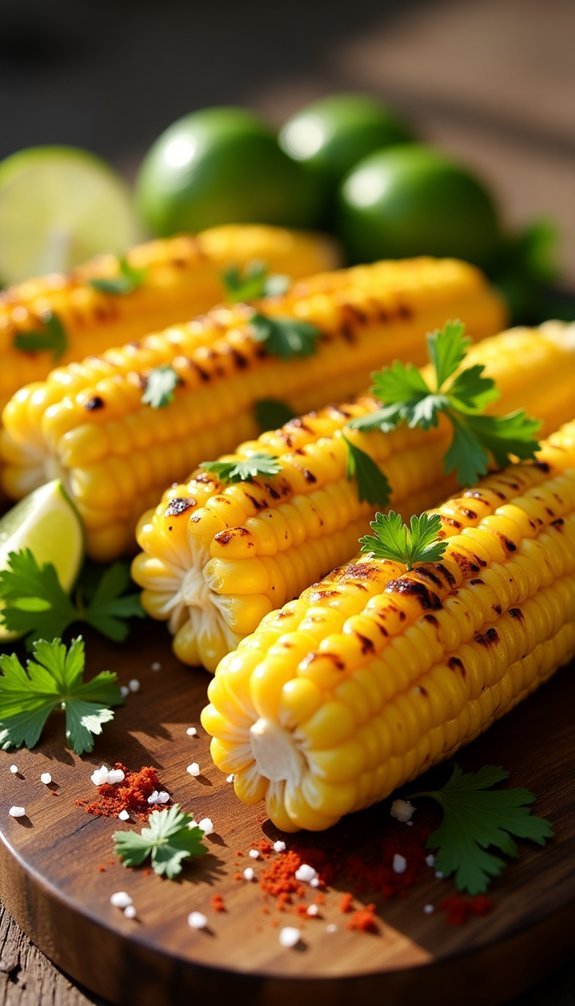
Grilling corn is a quintessential summer activity that brings out the sweet, smoky flavor of the kernels, while adding a delightful char that elevates any outdoor meal. The addition of cilantro and lime not only enhances the taste but also adds a revitalizing twist that complements the natural sweetness of the corn.
This Cilantro-Lime Grilled Corn recipe is perfect for barbecues, family gatherings, or a simple weeknight dinner. It’s quick to prepare and packed with flavor, making it a favorite among both adults and kids.
To achieve the best results, choose fresh, in-season corn on the cob. The fresher the corn, the sweeter and more flavorful it will be. This recipe can be easily adapted to suit your taste preferences; feel free to adjust the amount of cilantro and lime juice to your liking.
Serve the grilled corn as a side dish or as a topping for salads, tacos, or burrito bowls. Let’s plunge into the ingredients and cooking instructions to create this delicious dish.
Ingredients:
- 4 ears of fresh corn on the cob, husked
- 1/4 cup fresh cilantro, chopped
- 2 tablespoons lime juice
- 1/2 teaspoon chili powder (optional)
- 2 tablespoons olive oil
- Salt and pepper to taste
- Lime wedges for serving
Instructions:
Preheat your grill to medium-high heat. In a small bowl, combine the chopped cilantro, lime juice, olive oil, chili powder (if using), salt, and pepper.
Brush the mixture generously over each ear of corn, ensuring they’re well-coated. Place the corn directly on the grill grates and cook for about 10-15 minutes, turning occasionally, until the corn is tender and has charred spots.
Remove from the grill and serve hot with lime wedges on the side.
Extra Tips:
For an added burst of flavor, you can sprinkle some crumbled feta cheese or cotija cheese over the grilled corn right before serving.
Additionally, if you prefer a smokier flavor, consider soaking the corn in water for about 30 minutes before grilling to help prevent burning and to retain moisture.
Remember to keep an eye on the corn while grilling to prevent overcooking, which can lead to tough kernels. Enjoy your cilantro-lime grilled corn as a vibrant addition to any meal!
Grilled Peach and Burrata Salad
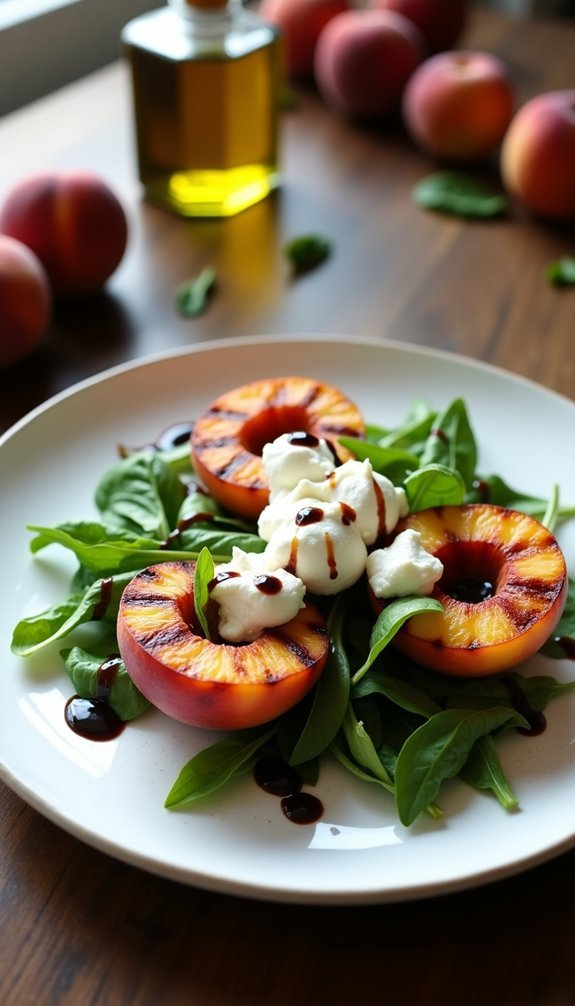
Grilled Peach and Burrata Salad is a delightful summer dish that brings together the sweetness of ripe peaches and the creaminess of burrata cheese. This salad is perfect for outdoor gatherings or a light dinner, combining fresh ingredients with a touch of smoky flavor from the grill.
The contrasting textures of charred peaches alongside the soft, luscious burrata create a heavenly flavor profile that’s certain to impress your guests. To elevate the dish, we’ll add fresh arugula, which provides a peppery bite, and a drizzle of balsamic reduction for a tangy finish.
The combination of ingredients isn’t only visually stunning but also packed with nutrients, making this salad a healthy yet indulgent option. Whether you’re hosting a barbecue or simply enjoying a quiet evening at home, this Grilled Peach and Burrata Salad is a must-try!
Ingredients:
- 2 ripe peaches, halved and pitted
- 8 oz burrata cheese
- 4 cups fresh arugula
- 2 tbsp olive oil
- Salt and pepper to taste
- Balsamic reduction (store-bought or homemade)
- Fresh basil leaves for garnish
Instructions:
Preheat your grill to medium heat. Brush the cut sides of the peach halves with olive oil and season lightly with salt and pepper. Place the peaches cut side down on the grill and cook for about 4-5 minutes, or until grill marks appear and the peaches are slightly softened.
Remove the peaches from the grill and let them cool for a few minutes. On a large platter, arrange the arugula, top with the grilled peach halves, and tear the burrata cheese into pieces, scattering it over the top. Drizzle with balsamic reduction, and garnish with fresh basil leaves before serving.
Extra Tips:
For the best results, choose peaches that are slightly firm but ripe to guarantee they hold their shape on the grill. If you can’t find burrata, fresh mozzarella can be a great substitute, though burrata’s creamy texture adds a luxurious touch.
Don’t hesitate to experiment with additional toppings like toasted nuts or a sprinkle of feta cheese for added flavor and crunch. Finally, serve the salad immediately after assembling to enjoy the freshest flavors, as the arugula may wilt if left too long with the warm peaches.
Teriyaki Beef Skewers With Pineapple
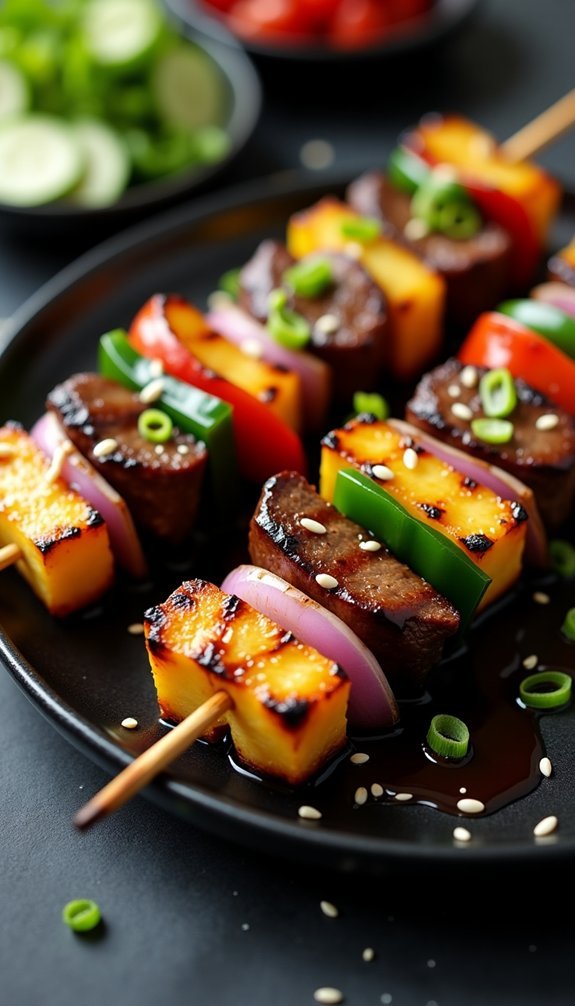
When it comes to summer cookouts or backyard barbecues, teriyaki beef skewers with pineapple are a delightful hit! The combination of tender marinated beef, sweet and tangy teriyaki sauce, and juicy pineapple chunks creates a mouthwatering flavor profile that’s hard to resist.
Not only are these skewers easy to assemble, but they also cook quickly on the grill, making them perfect for feeding a crowd or enjoying a cozy dinner at home. Pair them with a fresh salad or steamed rice for a complete meal that’s both satisfying and delicious.
To prepare these skewers, you’ll want to start by marinating the beef in a homemade or store-bought teriyaki sauce. This step is vital as it infuses the meat with flavor and helps to tenderize it.
While the beef is soaking up those savory flavors, you can prep your pineapple and any additional vegetables you’d like to include, such as bell peppers or onions. Once everything is ready, it’s time to assemble the skewers and get grilling!
Ingredients:
- 1 pound beef sirloin, cut into 1-inch cubes
- 1 cup teriyaki sauce
- 1 cup fresh pineapple, cut into 1-inch chunks
- 1 bell pepper, cut into 1-inch pieces (optional)
- 1 onion, cut into 1-inch pieces (optional)
- Skewers (wooden or metal)
- Salt and pepper to taste
- Olive oil (for grilling)
Cooking Instructions:
In a large bowl, combine the cubed beef and teriyaki sauce, ensuring the meat is well coated. Cover and marinate in the refrigerator for at least 1 hour, or up to overnight for maximum flavor.
Once marinated, preheat your grill to medium-high heat. Thread the beef, pineapple, and optional vegetables onto the skewers, alternating ingredients as desired. Lightly brush the skewers with olive oil and season with salt and pepper.
Grill the skewers for about 8-10 minutes, turning occasionally, until the beef is cooked to your desired level of doneness and the pineapple is caramelized.
Extra Tips:
For an extra layer of flavor, try adding a sprinkle of sesame seeds or chopped green onions on top before serving.
If you’re using wooden skewers, soak them in water for about 30 minutes beforehand to prevent burning on the grill. Additionally, feel free to customize your skewers with other vegetables like zucchini or mushrooms, and adjust the marinating time based on your preference for flavor intensity.
Enjoy your delicious teriyaki beef skewers with pineapple!
Zesty Lime Grilled Avocados
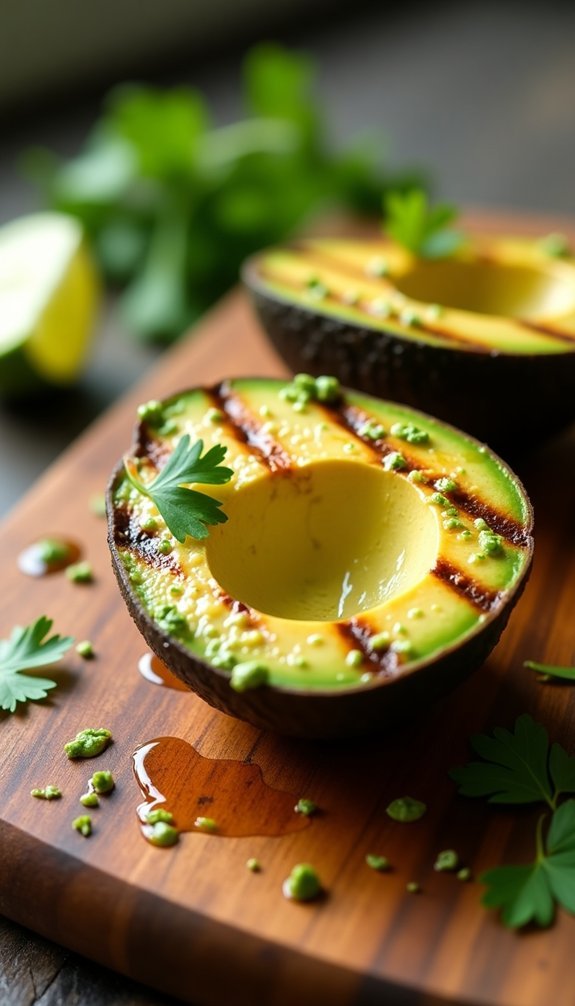
Zesty Lime Grilled Avocados are the perfect addition to your summer grilling repertoire. These creamy, rich avocados get a boost of flavor from a zesty lime marinade and a quick trip to the grill, creating a delightful smoky taste that enhances their natural goodness.
Whether served as a side dish, a topping for tacos, or a standalone appetizer, these grilled avocados are sure to impress your guests and elevate any meal.
The beauty of this recipe lies not only in its simplicity but also in the versatility it offers. The zesty lime marinade is light yet flavorful, making it an excellent complement to the buttery texture of the avocados.
With just a few ingredients, you can whip up a delicious dish that celebrates the flavors of summer. Plus, grilling avocados is a fun and unique way to prepare this beloved fruit, introducing a delightful twist to your outdoor dining experience.
Ingredients:
- 2 ripe avocados
- 2 tablespoons olive oil
- Juice of 1 lime
- Zest of 1 lime
- 1 teaspoon garlic powder
- 1/2 teaspoon salt
- 1/4 teaspoon black pepper
- Fresh cilantro, for garnish (optional)
Instructions:
Begin by preheating your grill to medium heat. While the grill is heating, cut the avocados in half lengthwise and remove the pit.
In a small bowl, whisk together the olive oil, lime juice, lime zest, garlic powder, salt, and black pepper to create the marinade. Brush the cut sides of the avocados generously with the marinade, making certain they’re evenly coated.
Place the avocados cut side down on the grill and cook for about 4-5 minutes, until grill marks appear and the avocados are slightly softened. Carefully remove them from the grill and garnish with fresh cilantro, if desired.
Extra Tips:
To guarantee your grilled avocados turn out perfectly, select ripe but firm avocados to prevent them from becoming mushy on the grill.
Keep an eye on the grilling time, as even a minute or two can make a difference in texture. For added flavor, consider sprinkling some crumbled feta or a drizzle of balsamic glaze before serving.
These grilled avocados can also be served with a side of salsa or enjoyed on top of a fresh salad for a delicious, healthy meal.
Grilled Portobello Mushroom Burgers
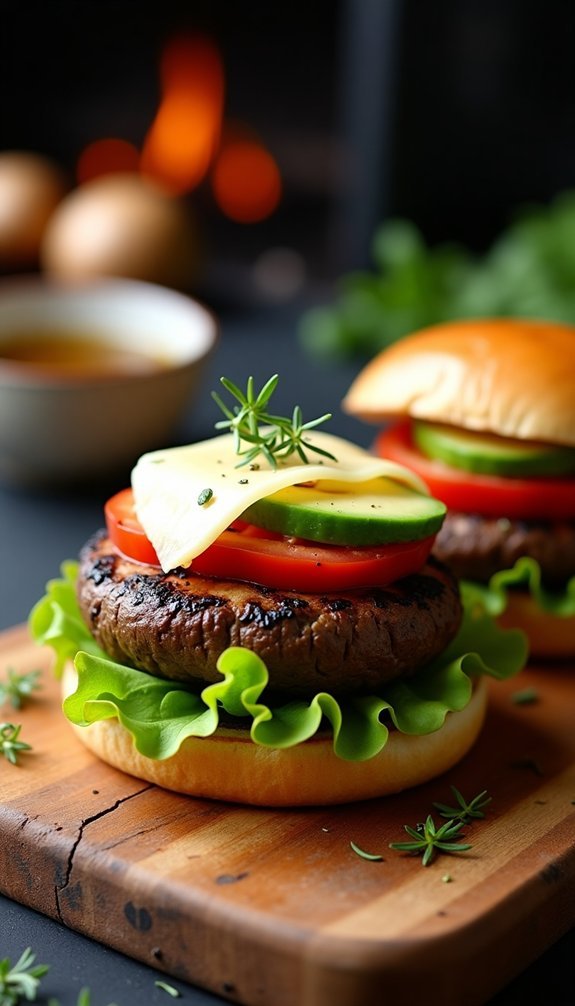
Grilled Portobello Mushroom Burgers are a delicious and hearty alternative to traditional meat burgers, making them a perfect choice for vegetarians and mushroom lovers alike. These meaty mushrooms aren’t only packed with flavor but also absorb marinades beautifully, enhancing their umami profile. Grilling them over an open flame caramelizes their natural sugars, creating a smoky depth that’s simply irresistible.
Served on a toasted bun with your favorite toppings, these burgers will satisfy even the most dedicated carnivores.
To prepare these burgers, you’ll want to select large, fresh Portobello mushrooms that are firm and free from blemishes. Marinating the mushrooms beforehand allows them to soak up flavors from the marinade, which can include a mix of balsamic vinegar, olive oil, garlic, and herbs.
Once grilled, these mushrooms provide a satisfying texture and a robust taste that pairs perfectly with toppings like fresh greens, tomatoes, and creamy sauces. Get ready to fire up the grill and enjoy a delicious plant-based meal!
Ingredients:
- 4 large Portobello mushrooms
- 1/4 cup balsamic vinegar
- 1/4 cup olive oil
- 2 cloves garlic, minced
- 1 teaspoon dried oregano
- 1 teaspoon dried thyme
- Salt and pepper to taste
- 4 whole-grain or artisan burger buns
- Lettuce leaves
- Sliced tomatoes
- Avocado slices
- Optional: cheese slices (for non-vegan option)
To cook the Grilled Portobello Mushroom Burgers, first, clean the mushrooms with a damp cloth and remove the stems. In a bowl, whisk together the balsamic vinegar, olive oil, minced garlic, oregano, thyme, salt, and pepper.
Place the mushrooms in a shallow dish and pour the marinade over them, ensuring they’re well coated. Allow them to marinate for at least 30 minutes. Preheat your grill to medium-high heat and grill the mushrooms for about 4-5 minutes on each side, or until they’re tender and have grill marks.
Toast the buns on the grill for about 1 minute. Assemble the burgers by placing a grilled mushroom on each bun and adding your choice of toppings.
When cooking Grilled Portobello Mushroom Burgers, it’s important to avoid overcooking the mushrooms, as they can become rubbery. If you prefer a cheesier version, add a slice of cheese on top of the mushrooms during the last minute of grilling so it can melt perfectly.
Feel free to experiment with different marinades or toppings, such as sautéed onions, pickles, or spicy aioli, to customize your burger to your taste. For a complete meal, serve your burgers with a side of grilled vegetables or a fresh salad. Enjoy this delicious and easy grilled dish!
Honey Mustard Glazed Carrots
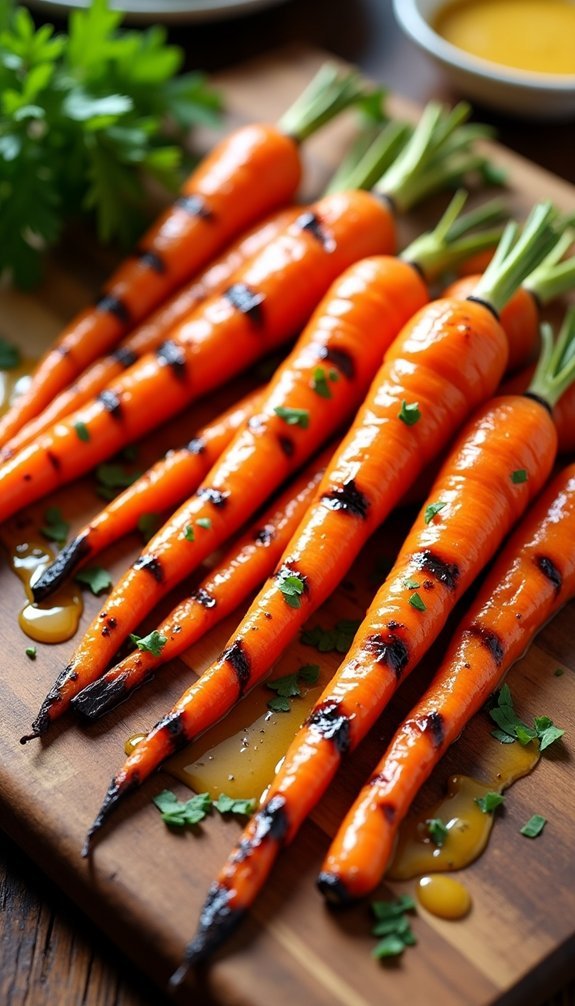
Grilling is a fantastic way to bring out the natural sweetness of vegetables, and carrots are no exception. The slight char from the grill, combined with a delightful honey mustard glaze, adds an irresistible flavor that elevates this humble vegetable to a standout side dish.
Whether you’re hosting a summer barbecue or simply enjoying a cozy dinner at home, these honey mustard glazed carrots are sure to impress your guests and family alike.
To prepare this dish, you’ll want to select fresh, vibrant carrots. The sweetness of the carrots pairs beautifully with the tangy and sweet honey mustard glaze. This recipe isn’t only easy to follow but also quick to prepare, making it a perfect addition to any meal.
With a few simple ingredients and minimal prep time, you can create a delicious side that complements a variety of grilled entrees.
Ingredients:
- 1 pound of fresh carrots, peeled and cut into sticks
- 3 tablespoons of honey
- 2 tablespoons of Dijon mustard
- 1 tablespoon of olive oil
- Salt and pepper to taste
- Fresh parsley for garnish (optional)
In a mixing bowl, combine the honey, Dijon mustard, olive oil, salt, and pepper to create the glaze. Add the prepared carrot sticks to the bowl and toss until they’re well coated.
Preheat your grill to medium heat, then place the carrots on a grill basket or skewers to prevent them from falling through the grates. Grill the carrots for about 8-10 minutes, turning occasionally, until they’re tender and have nice grill marks. Remove from the grill and garnish with fresh parsley if desired before serving.
When grilling carrots, remember that the cooking time may vary depending on the thickness of your carrot sticks, so keep an eye on them. For added flavor, consider marinating the carrots in the honey mustard mixture for 30 minutes prior to grilling.
This allows the flavors to penetrate the carrots more deeply. Additionally, you can experiment with different types of mustard or add a splash of apple cider vinegar for extra tang. Enjoy your deliciously grilled honey mustard glazed carrots!
Sriracha-Lime Grilled Chicken Thighs
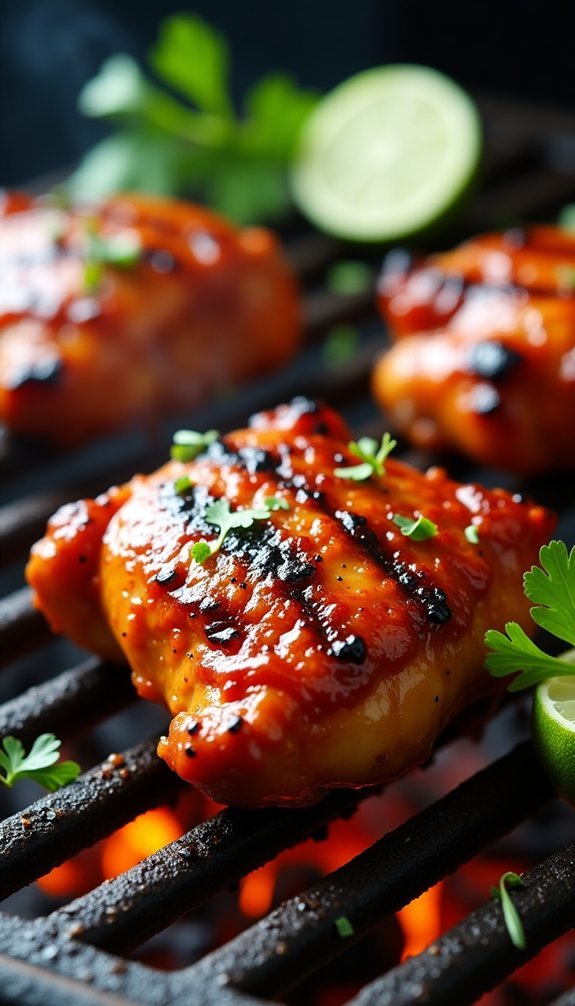
Sriracha-Lime Grilled Chicken Thighs are the perfect blend of heat and zest, making them an exciting addition to your grilling repertoire. The combination of Sriracha sauce and fresh lime juice creates a marinade that not only infuses the chicken with flavor but also helps to tenderize the meat. This dish is great for summer barbecues, family gatherings, or even a weeknight dinner when you want to spice things up.
Marinating the chicken thighs for at least an hour (or overnight, if time permits) is essential for achieving maximum flavor. As the chicken grills, the Sriracha caramelizes slightly, giving the dish a delightful char and a depth of flavor that will have everyone reaching for seconds. Serve these juicy thighs with a side of grilled vegetables or a crisp salad for a complete meal.
Ingredients:
- 4 bone-in, skin-on chicken thighs
- 3 tablespoons Sriracha sauce
- 2 tablespoons fresh lime juice
- 2 tablespoons olive oil
- 2 cloves garlic, minced
- 1 teaspoon honey
- 1 teaspoon salt
- ½ teaspoon black pepper
- Fresh cilantro, for garnish (optional)
- Lime wedges, for serving
Cooking Instructions:
In a large bowl, whisk together the Sriracha sauce, lime juice, olive oil, minced garlic, honey, salt, and pepper until well combined.
Add the chicken thighs to the marinade, ensuring they’re fully coated, and let them marinate for at least 1 hour in the refrigerator.
Preheat your grill to medium-high heat, then remove the chicken from the marinade, letting excess drip off.
Grill the chicken thighs skin-side down for about 6-7 minutes, then flip and continue grilling for an additional 6-8 minutes or until the internal temperature reaches 165°F.
Remove from the grill and let rest for a few minutes before serving, garnished with fresh cilantro and lime wedges.
Extra Tips:
For an extra kick, consider adding some lime zest to the marinade for an enhanced citrus flavor.
If you enjoy a smokier taste, try using a charcoal grill instead of gas.
You can also experiment with different levels of Sriracha to tailor the heat to your preference.
Finally, always let your meat rest after grilling to allow the juices to redistribute for a more succulent bite.
Enjoy your Sriracha-Lime Grilled Chicken Thighs!
Grilled Eggplant Roll-Ups With Ricotta
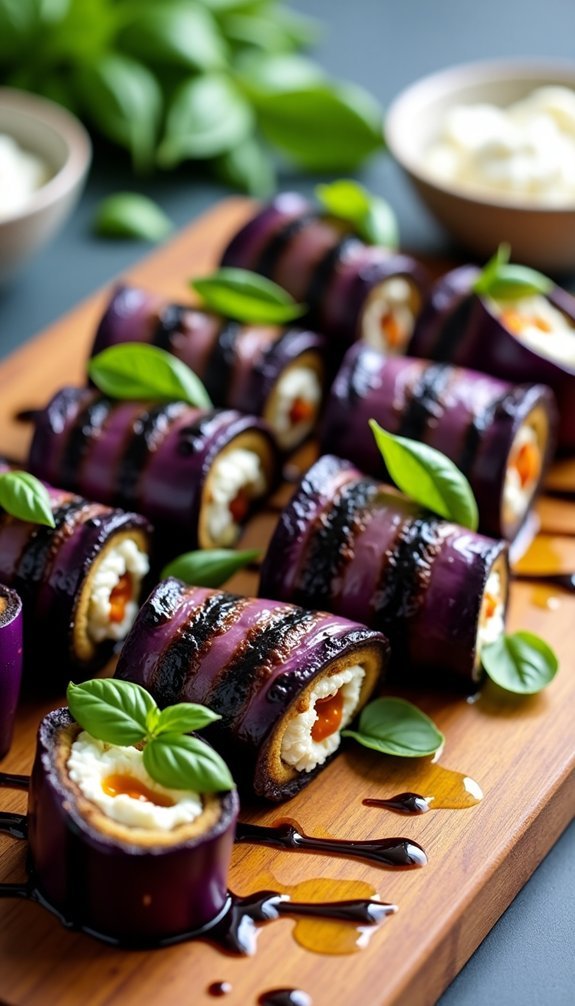
Grilled eggplant roll-ups with ricotta are a delightful and elegant dish that showcases the robust flavors of fresh vegetables and creamy cheese. This recipe is perfect for a summer barbecue or a cozy dinner at home, offering a satisfying vegetarian option that’s both healthy and delicious. The smoky flavor of the grilled eggplant pairs beautifully with the rich ricotta filling, making every bite a burst of flavor.
With minimal ingredients and straightforward steps, you’ll find this dish is as easy to prepare as it’s to impress.
To prepare these roll-ups, the eggplant slices are first grilled to perfection, enhancing their natural sweetness and giving them a tender texture. Once cooled, they’re filled with a luscious ricotta mixture, rolled up, and grilled again to meld the flavors together. This dish isn’t only visually appealing but also versatile; you can serve it as an appetizer, a side dish, or even a light main course. The addition of herbs and spices can elevate the flavor profile, allowing you to customize it to your taste.
Ingredients:
- 2 medium eggplants
- 1 cup ricotta cheese
- 1 cup grated mozzarella cheese
- 1/4 cup grated Parmesan cheese
- 1/4 cup fresh basil, chopped
- 2 cloves garlic, minced
- Salt and pepper to taste
- Olive oil for brushing
- Balsamic glaze for drizzling (optional)
Cooking Instructions:
Begin by preheating your grill to medium-high heat. Slice the eggplants lengthwise into thin strips, about 1/4 inch thick. Brush both sides of the eggplant slices with olive oil and season with salt and pepper.
Place the slices on the grill and cook for about 3-4 minutes on each side, until they’re tender and have nice grill marks. In a bowl, mix together the ricotta cheese, mozzarella, Parmesan, chopped basil, and minced garlic.
Once the eggplant slices are grilled and slightly cooled, place a spoonful of the ricotta mixture on the wider end of each slice, roll them up tightly, and secure with a toothpick. Return the roll-ups to the grill for an additional 2-3 minutes to heat the filling through and lightly char the outside.
Extra Tips:
To add an extra layer of flavor, consider marinating the eggplant slices in a mixture of olive oil, balsamic vinegar, and your favorite herbs before grilling. This will enhance their flavor even more.
Additionally, feel free to experiment with different cheeses, such as feta or goat cheese, for a unique twist. If you have leftovers, these roll-ups can be stored in the refrigerator for a couple of days and enjoyed cold or reheated.
Drizzling with balsamic glaze before serving will add a sweet acidity that pairs wonderfully with the creamy filling.
Lemon Garlic Grilled Shrimp Tacos

Lemon Garlic Grilled Shrimp Tacos are a delightful and invigorating option for any summer gathering or weeknight dinner. The combination of zesty lemon, aromatic garlic, and succulent shrimp creates a flavor-packed filling that’s perfect for wrapping in warm tortillas.
Add fresh toppings like avocado, cabbage, and a creamy sauce, and you have a taco that not only tastes amazing but also feels light and vibrant. These tacos are incredibly easy to prepare, making them a great choice for both novice and experienced cooks.
Grilling the shrimp enhances their natural sweetness and gives them a beautiful char, while the bright citrus notes brighten up the entire dish. Perfect for a quick meal or a festive occasion, these Lemon Garlic Grilled Shrimp Tacos are sure to impress your family and friends.
Ingredients:
- 1 pound large shrimp, peeled and deveined
- 3 cloves garlic, minced
- Juice and zest of 2 lemons
- 2 tablespoons olive oil
- 1 teaspoon smoked paprika
- 1 teaspoon cumin
- Salt and pepper to taste
- 8 small corn or flour tortillas
- 1 cup shredded cabbage
- 1 avocado, sliced
- Fresh cilantro, for garnish
- Sour cream or Greek yogurt, for topping (optional)
Cooking Instructions:
In a large bowl, combine the shrimp, minced garlic, lemon juice, lemon zest, olive oil, smoked paprika, cumin, salt, and pepper. Let the shrimp marinate for at least 15 minutes to absorb the flavors.
Preheat your grill or grill pan over medium-high heat. Once hot, thread the shrimp onto skewers (if using wooden skewers, soak them in water for 30 minutes beforehand). Grill the shrimp for 2-3 minutes on each side until they’re opaque and cooked through. Remove from the grill and let them rest for a minute before assembling your tacos.
Extra Tips:
For an extra layer of flavor, consider adding a dash of chili powder or cayenne pepper to the marinade for some heat. If you don’t have a grill, you can easily cook the shrimp in a skillet over medium-high heat.
Additionally, feel free to customize your toppings; diced tomatoes, lime wedges, and a sprinkle of feta cheese can add a unique twist to your tacos. Enjoy experimenting with different ingredients to suit your taste!
Grilled Asparagus With Balsamic Reduction
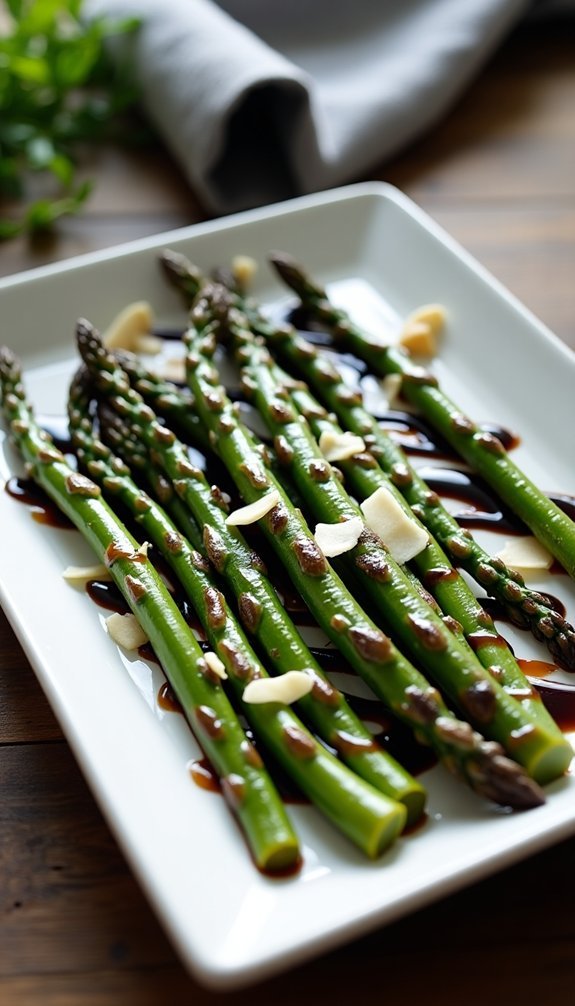
Grilled asparagus with balsamic reduction is a delightful dish that perfectly balances the earthy flavor of the asparagus with the rich, tangy sweetness of the balsamic vinegar. This recipe isn’t only simple to prepare but also makes for a stunning side dish that pairs well with a variety of main courses, from grilled meats to hearty vegetarian options.
The grilling process enhances the natural flavors of the asparagus while adding a slight char, making every bite a burst of flavor. The balsamic reduction adds an elegant touch, transforming this humble vegetable into a gourmet experience.
To achieve the perfect reduction, you’ll simmer the balsamic vinegar until it thickens and becomes syrupy, intensifying its flavor. When drizzled over the grilled asparagus, it creates a beautiful glaze that’s both visually appealing and delicious. This dish is ideal for summer barbecues or as a quick weeknight side.
Ingredients:
- 1 pound fresh asparagus, trimmed
- 2 tablespoons olive oil
- Salt and pepper, to taste
- 1 cup balsamic vinegar
- 1 tablespoon honey (optional)
- Freshly grated Parmesan cheese (optional, for serving)
Cooking Instructions:
Preheat your grill to medium-high heat. In a bowl, toss the asparagus with olive oil, salt, and pepper until evenly coated.
Place the asparagus on the grill in a single layer and cook for about 5-7 minutes, turning occasionally until tender and slightly charred. While the asparagus is grilling, pour the balsamic vinegar into a small saucepan and bring it to a simmer over medium heat.
Reduce the heat to low and let the vinegar simmer for about 10-15 minutes or until it thickens to a syrupy consistency. If desired, stir in honey for added sweetness. Once the asparagus is done, remove it from the grill and drizzle the balsamic reduction over the top before serving.
Extra Tips:
For the best flavor, choose fresh, firm asparagus that’s bright green and slightly crisp. Be careful not to overcook the asparagus, as it should retain some crunch.
If you prefer, you can add a sprinkle of freshly grated Parmesan cheese over the top just before serving for an extra layer of flavor. This dish can also be made ahead of time; simply grill the asparagus and prepare the balsamic reduction, then reheat them slightly before serving to enjoy at your convenience.
Spiced Lamb Chops With Mint Yogurt Sauce
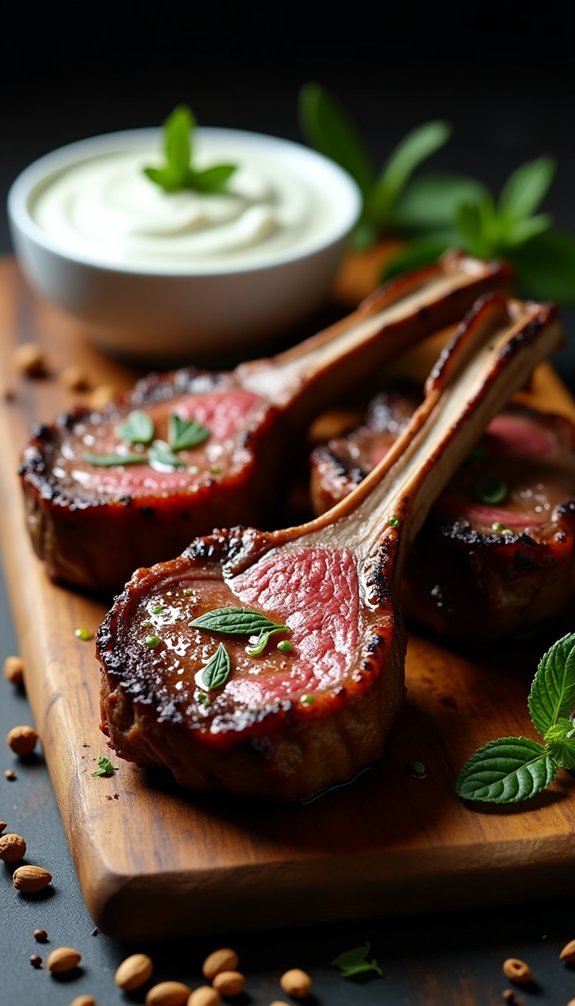
Spiced lamb chops with mint yogurt sauce are a perfect dish for those who want to impress their guests with bold flavors and a touch of sophistication. The combination of aromatic spices and tender lamb creates a mouthwatering experience that’s certain to delight. When paired with a revitalizing mint yogurt sauce, this dish becomes a harmonious blend of savory and cool, making it ideal for warm weather grilling or as a standout centerpiece for any dinner party.
To prepare these delectable lamb chops, start by marinating the meat in a mixture of spices that infuse it with rich flavors. The marinade typically consists of cumin, coriander, garlic, and paprika, which complement the natural richness of the lamb.
While the lamb is soaking up these delicious seasonings, you can whip up the mint yogurt sauce, a simple yet elegant accompaniment that adds a revitalizing contrast to the spiced meat. This recipe isn’t just about cooking; it’s about creating a memorable dining experience.
Ingredients:
- 8 lamb chops, frenched
- 2 tablespoons olive oil
- 1 teaspoon ground cumin
- 1 teaspoon ground coriander
- 1 teaspoon smoked paprika
- 2 cloves garlic, minced
- Salt and pepper, to taste
- 1 cup plain Greek yogurt
- 1/2 cup fresh mint leaves, chopped
- Juice of 1 lemon
Cooking Instructions:
In a large bowl, combine the olive oil, ground cumin, ground coriander, smoked paprika, minced garlic, salt, and pepper. Add the lamb chops to the bowl and coat them thoroughly with the marinade.
Let the lamb marinate for at least 30 minutes at room temperature, or up to 2 hours in the refrigerator for a more intense flavor. While the lamb is marinating, prepare the mint yogurt sauce by mixing the Greek yogurt, chopped mint leaves, and lemon juice in a separate bowl until well combined.
Preheat your grill to medium-high heat, then cook the lamb chops for about 4-5 minutes on each side for medium-rare, adjusting the time according to your preferred doneness. Serve the lamb chops hot with a generous dollop of the mint yogurt sauce on the side.
Extra Tips:
For best results, let the lamb chops come to room temperature before grilling; this guarantees even cooking. If you prefer a charred exterior, consider searing the chops first on high heat for 1-2 minutes per side before reducing the heat to cook them through.
Additionally, feel free to adjust the spice levels in the marinade according to your taste preference. The mint yogurt sauce can also be enhanced with a pinch of cayenne for added heat or a drizzle of honey for a touch of sweetness. Enjoy your grilling adventure!
Grilled Zucchini and Quinoa Salad
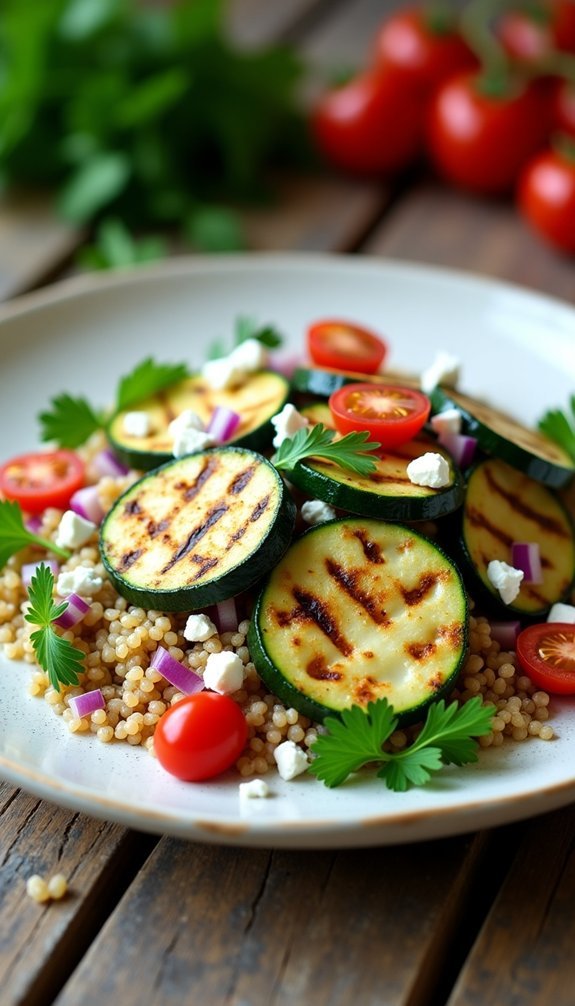
Grilled Zucchini and Quinoa Salad is a delightful dish that brings together the earthy flavors of grilled vegetables and the nutty taste of quinoa. This salad isn’t only invigorating but also packed with nutrients, making it a perfect addition to any summer meal or a healthy lunch option. The vibrant colors of the zucchini, along with the fluffy quinoa and fresh herbs, create a visually appealing plate that’s sure to impress your guests.
To prepare this salad, the zucchini is first grilled to perfection, enhancing its flavor and adding a subtle smokiness. The quinoa serves as a hearty base, providing protein and fiber. Tossed together with a zesty dressing and fresh herbs, this salad offers a balanced combination of textures and tastes that will have you coming back for seconds. It’s also easily customizable—feel free to add your favorite vegetables or proteins for a more filling meal.
Ingredients:
- 2 medium zucchinis, sliced into rounds
- 1 cup quinoa, rinsed
- 2 cups vegetable broth or water
- 1 cup cherry tomatoes, halved
- 1/4 cup red onion, diced
- 1/4 cup fresh parsley, chopped
- 1/4 cup feta cheese, crumbled (optional)
- 3 tablespoons olive oil
- 2 tablespoons lemon juice
- Salt and pepper to taste
To cook this dish, start by preheating your grill to medium heat. While the grill is heating, cook the quinoa by bringing vegetable broth or water to a boil in a saucepan, adding the rinsed quinoa, reducing the heat to low, and covering for about 15 minutes or until the liquid is absorbed.
Meanwhile, toss the zucchini slices with olive oil, salt, and pepper, then grill them for about 4-5 minutes on each side, until they’re tender and have nice grill marks. Once everything is cooked, combine the quinoa, grilled zucchini, cherry tomatoes, red onion, parsley, and feta in a large bowl. Drizzle with lemon juice, season with salt and pepper, and toss gently to combine.
For the best results, make sure to let the quinoa cool slightly before mixing it with the grilled zucchini and other ingredients to avoid wilting the fresh herbs. You can also prepare the salad ahead of time; just keep the dressing separate until you’re ready to serve.
Experiment with different herbs like basil or mint for a fresh twist, and consider adding nuts or seeds for extra crunch. Enjoy your delicious Grilled Zucchini and Quinoa Salad!
Chocolate-Covered Grilled Bananas
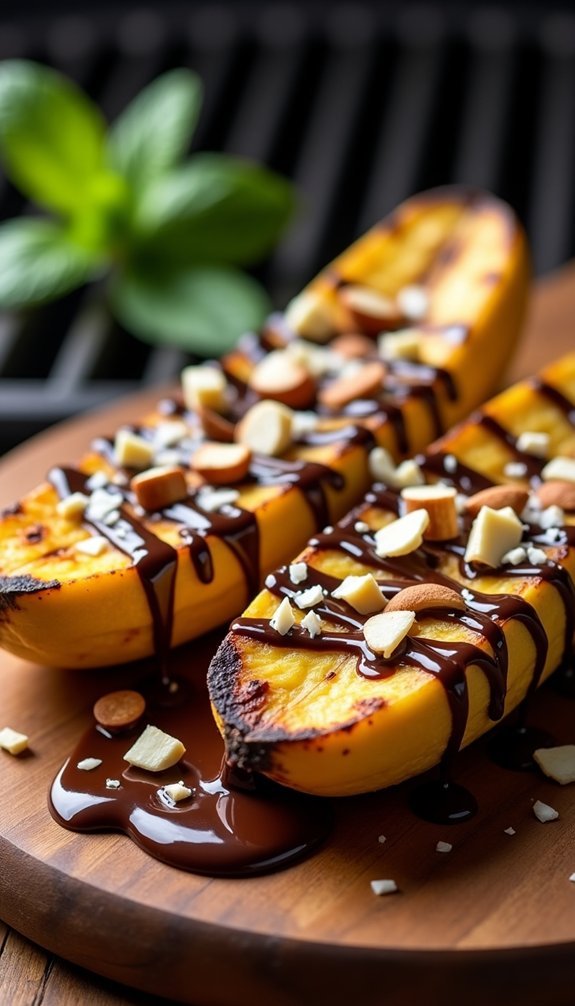
Grilling may not be the first thing that comes to mind when you think of dessert, but chocolate-covered grilled bananas are a delightful twist that can elevate your outdoor cooking experience. The natural sweetness of ripe bananas caramelizes beautifully on the grill, while the melted chocolate adds a rich, decadent touch. This treat is easy to prepare and offers a unique combination of textures and flavors that will impress your family and friends at your next cookout.
To make this dessert even more exciting, feel free to customize it with toppings such as chopped nuts, shredded coconut, or a drizzle of honey after grilling. The best part is that it requires minimal ingredients and can be whipped up in no time, making it the perfect last-minute addition to any barbecue. So fire up the grill and get ready to indulge in this scrumptious treat that combines the smoky aroma of grilling with the sweet satisfaction of chocolate!
Ingredients:
- 2 ripe bananas
- 1 cup chocolate chips (semi-sweet or dark)
- 1 tablespoon coconut oil (optional)
- Aluminum foil (for grilling)
- Optional toppings: chopped nuts, shredded coconut, or honey
Instructions:
Preheat your grill to medium heat. While the grill is heating up, peel the bananas and slice them in half lengthwise.
If desired, melt the chocolate chips with the coconut oil in a microwave-safe bowl for about 30 seconds, stirring until smooth. Place the banana halves on a piece of aluminum foil, cut side up, and drizzle the melted chocolate over them.
Wrap the foil tightly around the bananas, creating a packet to hold in the heat and flavor. Place the packet on the grill and cook for about 5-7 minutes, or until the bananas are warm and the chocolate is melted.
Carefully remove the packet from the grill, unwrap it, and serve immediately.
Extra Tips:
Make sure to choose ripe bananas for the best flavor, as they’ll be sweeter and softer when grilled.
You can also experiment with different types of chocolate, such as white chocolate or flavored varieties, to suit your palate. For added flair, consider sprinkling your favorite toppings over the grilled bananas right before serving.
Remember to handle the foil packet with care, as it will be hot, and enjoy this delightful dessert while it’s warm for the ultimate experience!
So now that you have seen our list of Creative Grilling Recipes. Its time to send us a few of yours. We are always looking for new things to cook. So help us out. Enjoy our list of Creative Grilling Recipes and let us enjoy yours.