Whether you’re celebrating a milestone or simply craving something decadent, you’ll love exploring the art of chocolate mousse cake. This elegant French dessert combines silky-smooth chocolate layers with airy whipped textures that’ll melt in your mouth. As a no-bake option, it’s surprisingly approachable yet maintains that wow factor you’re looking for. Once you understand the basic techniques of tempering chocolate and folding in egg whites, you’ll discover why this classic has captivated dessert lovers for generations. Let’s reveal the secrets to creating your own masterpiece.
History of Chocolate Mousse Cake
While the exact origins of chocolate mousse cake remain somewhat unclear, this elegant dessert emerged in French kitchens during the late 1800s.
You’ll find its roots intertwined with the rise of French pastry-making, when chefs began experimenting with chocolate and new whipping techniques.
What you mightn’t know is that chocolate mousse cake didn’t gain widespread popularity until the 1950s, when home refrigeration became common.
Before that, you’d only find this dessert in upscale restaurants and fancy patisseries.
The modern version you’re familiar with today was perfected in the 1960s, when French chefs started combining traditional mousse with cake layers.
You can thank renowned pastry chef Michel Roux for popularizing the recipe that most closely resembles today’s chocolate mousse cake.
The best Chocolate Mousse Cake Recipe
This elegant chocolate mousse cake transforms simple ingredients into a sophisticated dessert that perfectly balances rich chocolate intensity with light, airy texture. The combination of dark chocolate, whipped cream, and perfectly beaten egg whites creates distinct layers that provide a memorable taste experience.
The beauty of this recipe lies in its straightforward preparation method, which requires no baking but delivers professional-looking results. When properly chilled, the mousse sets into a silky-smooth texture that melts in your mouth, while the whipped cream topping adds a final touch of luxury.
- 12 ounces dark chocolate, chopped
- 2 cups heavy whipping cream
- 4 large eggs
- 1/3 cup granulated sugar
- 1 teaspoon vanilla extract
Using a double boiler, melt the chocolate until smooth and let it cool slightly. Whip 1½ cups of heavy cream until stiff peaks form and set aside.
Separate the eggs and beat the whites with sugar until glossy peaks form. Gently fold the melted chocolate into the remaining cream, then incorporate the egg whites in three portions.
Transfer the mixture into a parchment-lined springform pan and refrigerate for at least 6 hours or overnight. Before serving, whip the remaining cream with vanilla extract and spread it over the cake.
For best results, bring all ingredients except the heavy cream to room temperature before starting. The chocolate should be cooled but still fluid when incorporating it into the mixture to prevent seizing.
Clean, dry equipment is essential when whipping egg whites, as any trace of fat can prevent proper peaks from forming. When cutting the cake, use a knife dipped in hot water and wiped clean between slices for professional presentation.
The cake can be prepared up to two days in advance and stored covered in the refrigerator.
Cooking Steps
So to get started with our or rather your best Chocolate Mousse Cake ever you will need to do these simple tasks. Once completed and your family or friends try this you will be so very happy that you took the time to try it. Trust us when we tell you this is the very best Chocolate Mousse Cake you will ever have!
You’ll start by melting the chocolate in your double boiler setup, while simultaneously whipping the cream until stiff peaks form.
Next, you’ll need to carefully separate your eggs and beat the whites with sugar until they’re glossy and firm.
Finally, you’ll fold everything together in stages – chocolate with cream first, then the egg whites in three portions – before transferring your mixture to a parchment-lined springform pan!
step 1. Prepare Double Boiler Setup

Setting up a proper double boiler forms the critical first step in achieving silky-smooth melted chocolate for your mousse cake.
You’ll need two pots that fit together snugly – a larger bottom pot for water and a smaller top pot or heat-safe bowl for the chocolate.
Fill the bottom pot with about 2 inches of water, making sure it won’t touch the base of your top container when assembled.
Place the pot over medium heat until you see gentle steaming, but don’t let it reach a rolling boil.
Once you’ve positioned your top bowl securely, you’re ready to add your chopped chocolate.
The steam’s indirect heat will guarantee your chocolate melts evenly without scorching – no one wants grainy mousse!
step 2. Whip Cream Until Peaks Form
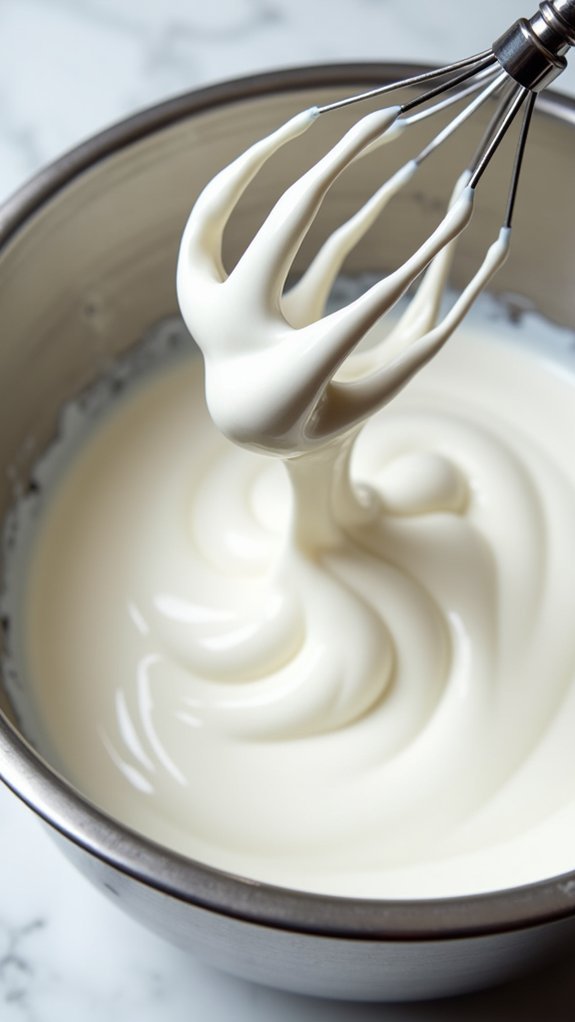
Pour the cold heavy cream into a large mixing bowl, maintaining a temperature below 40°F for ideal whipping results.
Using an electric mixer at medium speed, gradually increase to high as the cream begins to thicken.
You’ll notice the cream passing through several stages – first liquid, then slightly foamy, and finally developing soft peaks.
Keep beating until stiff peaks form, which means the cream stands straight up when you lift the beaters.
Don’t overbeat, or you’ll end up with butter!
Test your peaks by turning the beater upside down – the cream should hold its shape firmly without drooping.
If you’re whipping by hand (hello, arm workout!), expect to spend about 8-10 minutes achieving the right consistency.
Set aside 1½ cups for folding into the mousse, reserving the remainder for topping.
step 3. Separate and Beat Eggs
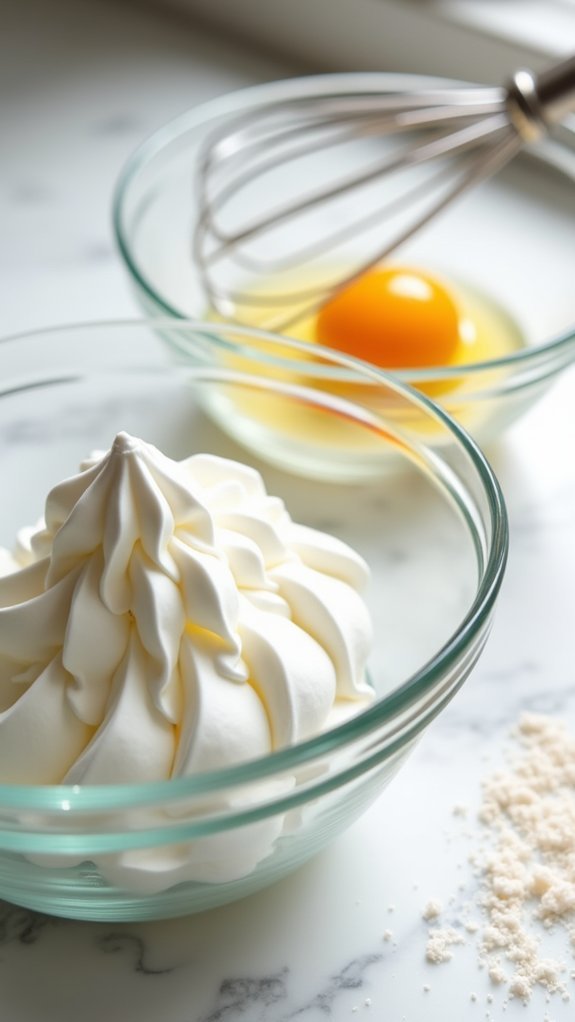
Cracking eggs with precision marks the start of our mousse’s essential texture-building phase.
You’ll need to separate four large eggs, carefully dropping each white into a clean mixing bowl while placing yolks in a separate container.
Before you begin beating, make sure your mixing bowl is completely free of any grease or yolk residue – even a tiny speck can prevent proper whipping!
Start your mixer on medium speed, gradually adding the 1/3 cup sugar to the egg whites. You’ll notice the mixture becoming increasingly cloudy, then white and foamy.
Continue beating until you achieve glossy, medium-stiff peaks that hold their shape when you lift the beater.
Don’t overbeat, though – you want your whites to remain silky and smooth, not dry and grainy.
step 4. Fold Ingredients Together
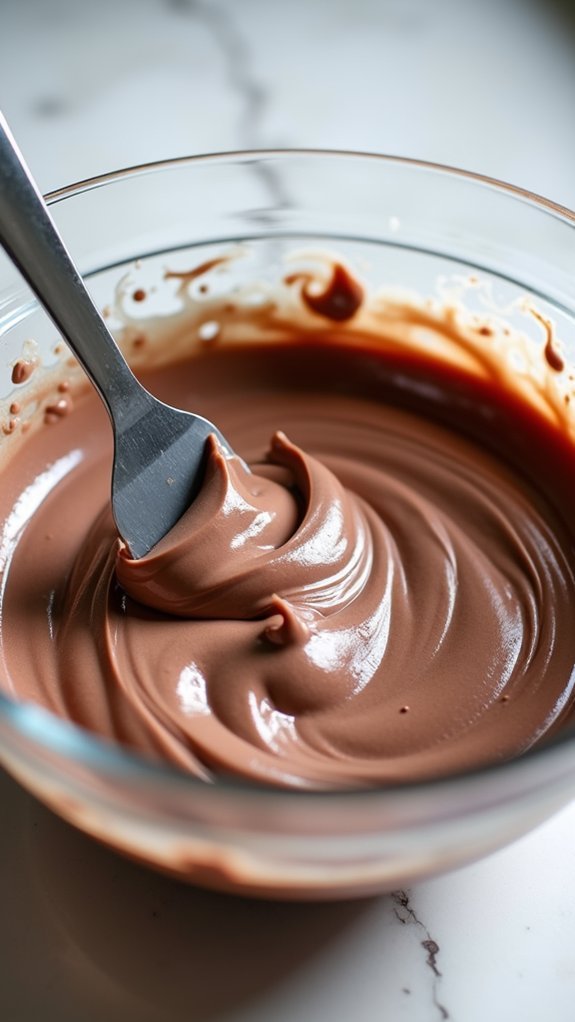
Gently folding your ingredients together is the essential step that gives this mousse its signature cloudlike texture.
You’ll want to work carefully to maintain all that precious air you’ve whipped into your components.
Start by slowly incorporating the melted chocolate into the 1/2 cup of cream, using a rubber spatula to fold from bottom to top in a figure-eight motion.
Once that’s combined, add one-third of your glossy egg white mixture – this first portion helps lighten the chocolate base.
Add the remaining egg whites in two more additions, maintaining a light touch and folding just until you no longer see white streaks.
Don’t overmix! You’ll know you’re done when the mousse looks uniform in color and holds soft peaks that slowly dissolve back into the mixture.
step 5. Pour Into Springform Pan
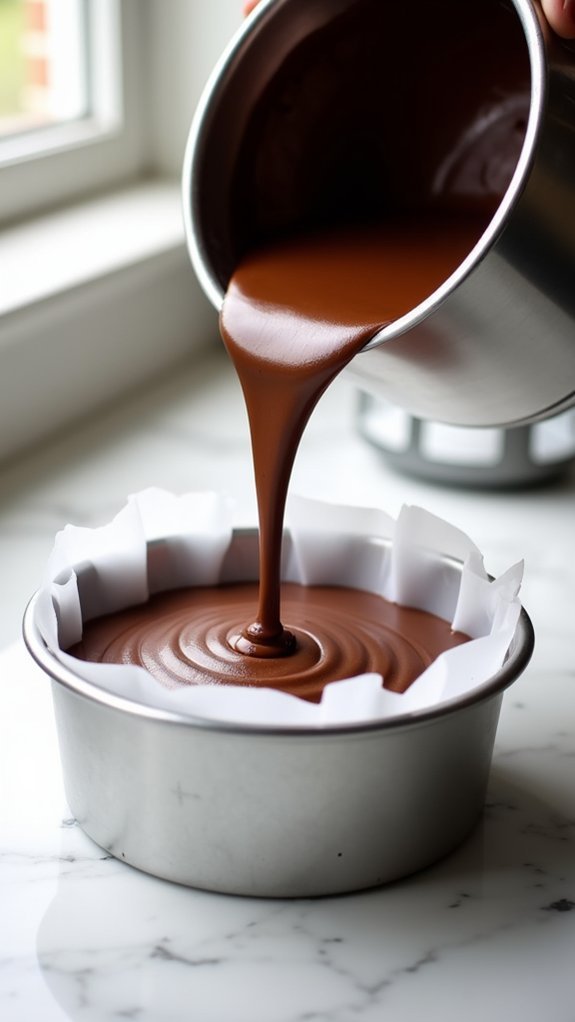
The properly prepared springform pan serves as your mousse cake’s cozy new home! Before pouring, make certain your 9-inch pan is lined with parchment paper and the sides are lightly greased for easy removal later.
Pour your perfectly folded chocolate mousse mixture into the pan in a steady stream, aiming for the center to guarantee even distribution. Use a rubber spatula to gently smooth the top surface – no need to be a perfectionist, as it’ll be covered with whipped cream later!
Tap the pan gently on the counter 2-3 times to release any trapped air bubbles.
Check that the mousse is level, then carefully transfer the pan to your refrigerator. Place it on a flat surface and make certain it’s sitting perfectly level to achieve those picture-perfect layers you’re dreaming of.
Final Thoughts
While mastering this chocolate mousse cake takes some practice, you’ll find the effort worthwhile once you’ve created this show-stopping dessert.
Remember to give yourself plenty of time, as proper chilling is essential for those picture-perfect slices.
Don’t worry if your first attempt isn’t magazine-worthy – even professional bakers took time to perfect their technique!
Keep your ingredients organized and at the right temperature before starting, and you’ll be amazed at how smoothly the process goes.
Consider making this dessert for special occasions when you want to impress your guests without spending hours in the kitchen.
Once you’ve mastered the basic recipe, feel free to experiment with different chocolate varieties or add your own creative touches to make it uniquely yours.